Roadmap Planner Macro
Create simple, visual timelines that are useful for planning projects, software releases and much more with the Roadmap macro.
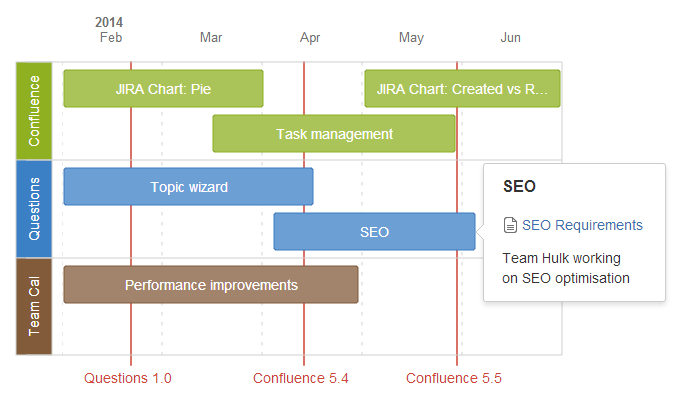
Roadmaps are made up of:
- bars to indicate phases of work
- lanes to differentiate between teams, products or streams
- markers to highlight important dates and milestones
- a timeline showing months or weeks.
You can provide more information about items on your roadmap by linking a bar to a page.
Adding the Roadmap macro
To add the Roadmap macro to a page:
- In the Confluence editor, choose Insert > Other Macros
- Find and select the required macro
Speeding up macro entry with autocomplete: Type { and the beginning of the macro name, to see a list of suggested macros. Details are in Autocomplete for links, files, macros and mentions.
To edit an existing macro: Click the macro placeholder and choose Edit. A macro dialog window will open, where you can edit the parameters of the macro.
Screenshot: Roadmap macro as it appears on a page
Editing your Roadmap
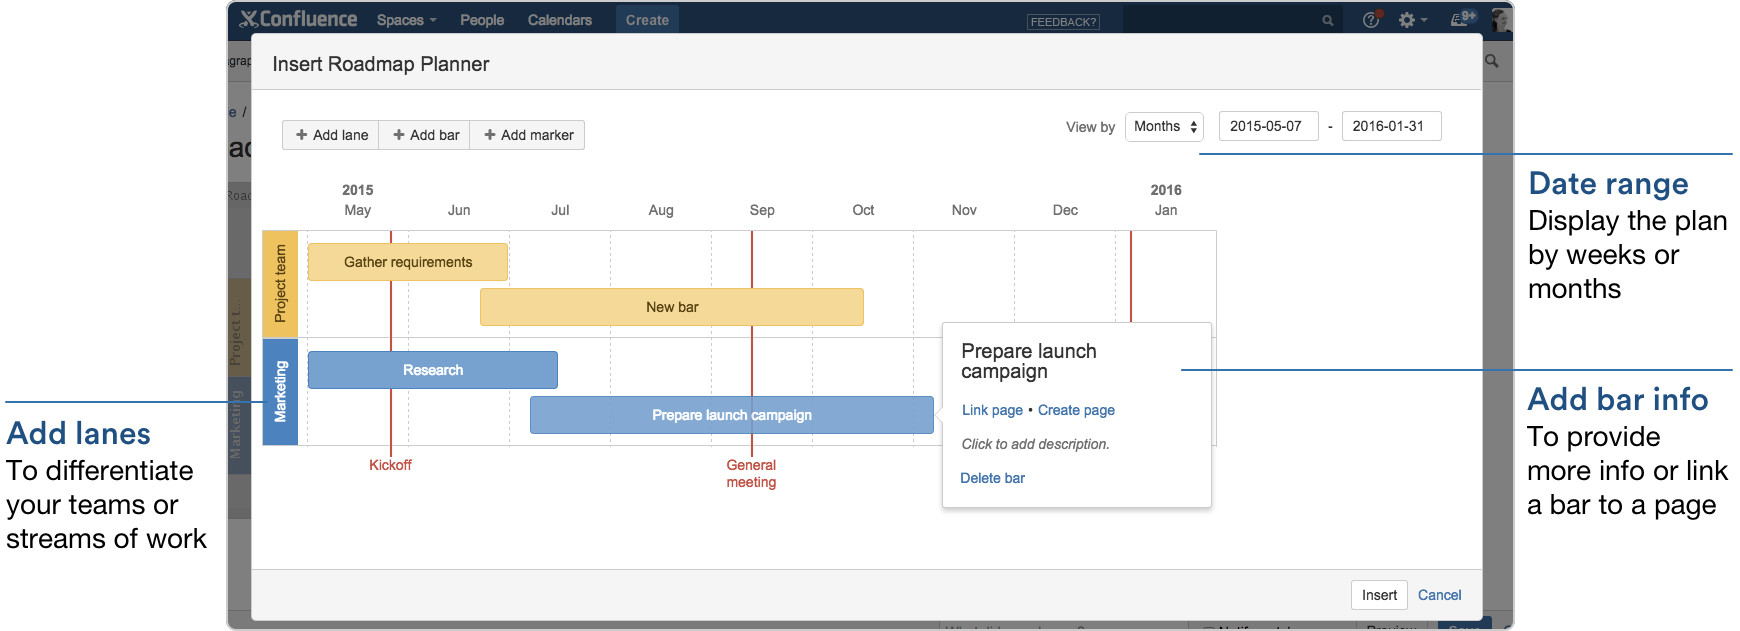
To edit your roadmap:
- Select the roadmap and choose Edit.
- Add lanes, bars and markers.
- Drag lanes, bars and markers to the desired location on the roadmap.
- Select lanes, bars and markers to add text, change colours and remove from the roadmap.
- Select bars to add links to existing pages, create new pages or add a description.
- Set the start and end dates for the roadmap and choose to display it by weeks or months.
Screenshot: Roadmap macro in the editor
Parameters
This macro does not use the macro browser to set parameters. You also cannot add this macro via wiki markup or by editing the storage format directly.
Notes
The Roadmap macro was previously available as an add-on from The Marketplace. The macro has changed significantly. If you had an older version of the macro installed you will be able to view your existing roadmaps but not edit them.