Split your import data into multiple object types
You can split your import data into different object types using Assets Query Language (AQL). This allows you to load multiple object types from a single source of data and avoid creating separate import files and configurations for different object types on an object schema.
On this page:
- Preparing object types
- Creating object type and attribute mapping to split your data
- Splitting import data by attributes
- Next steps
For testing purposes, you can use the following CSV file sample. This file includes the information about two types of devices: servers and computers.
Name, Type
Dell Server 1, Server
HP Server 1, Server
Compaq, Computer
Mac PC, Computer
Dell Server 2, Server
Mac PC 2, Computer
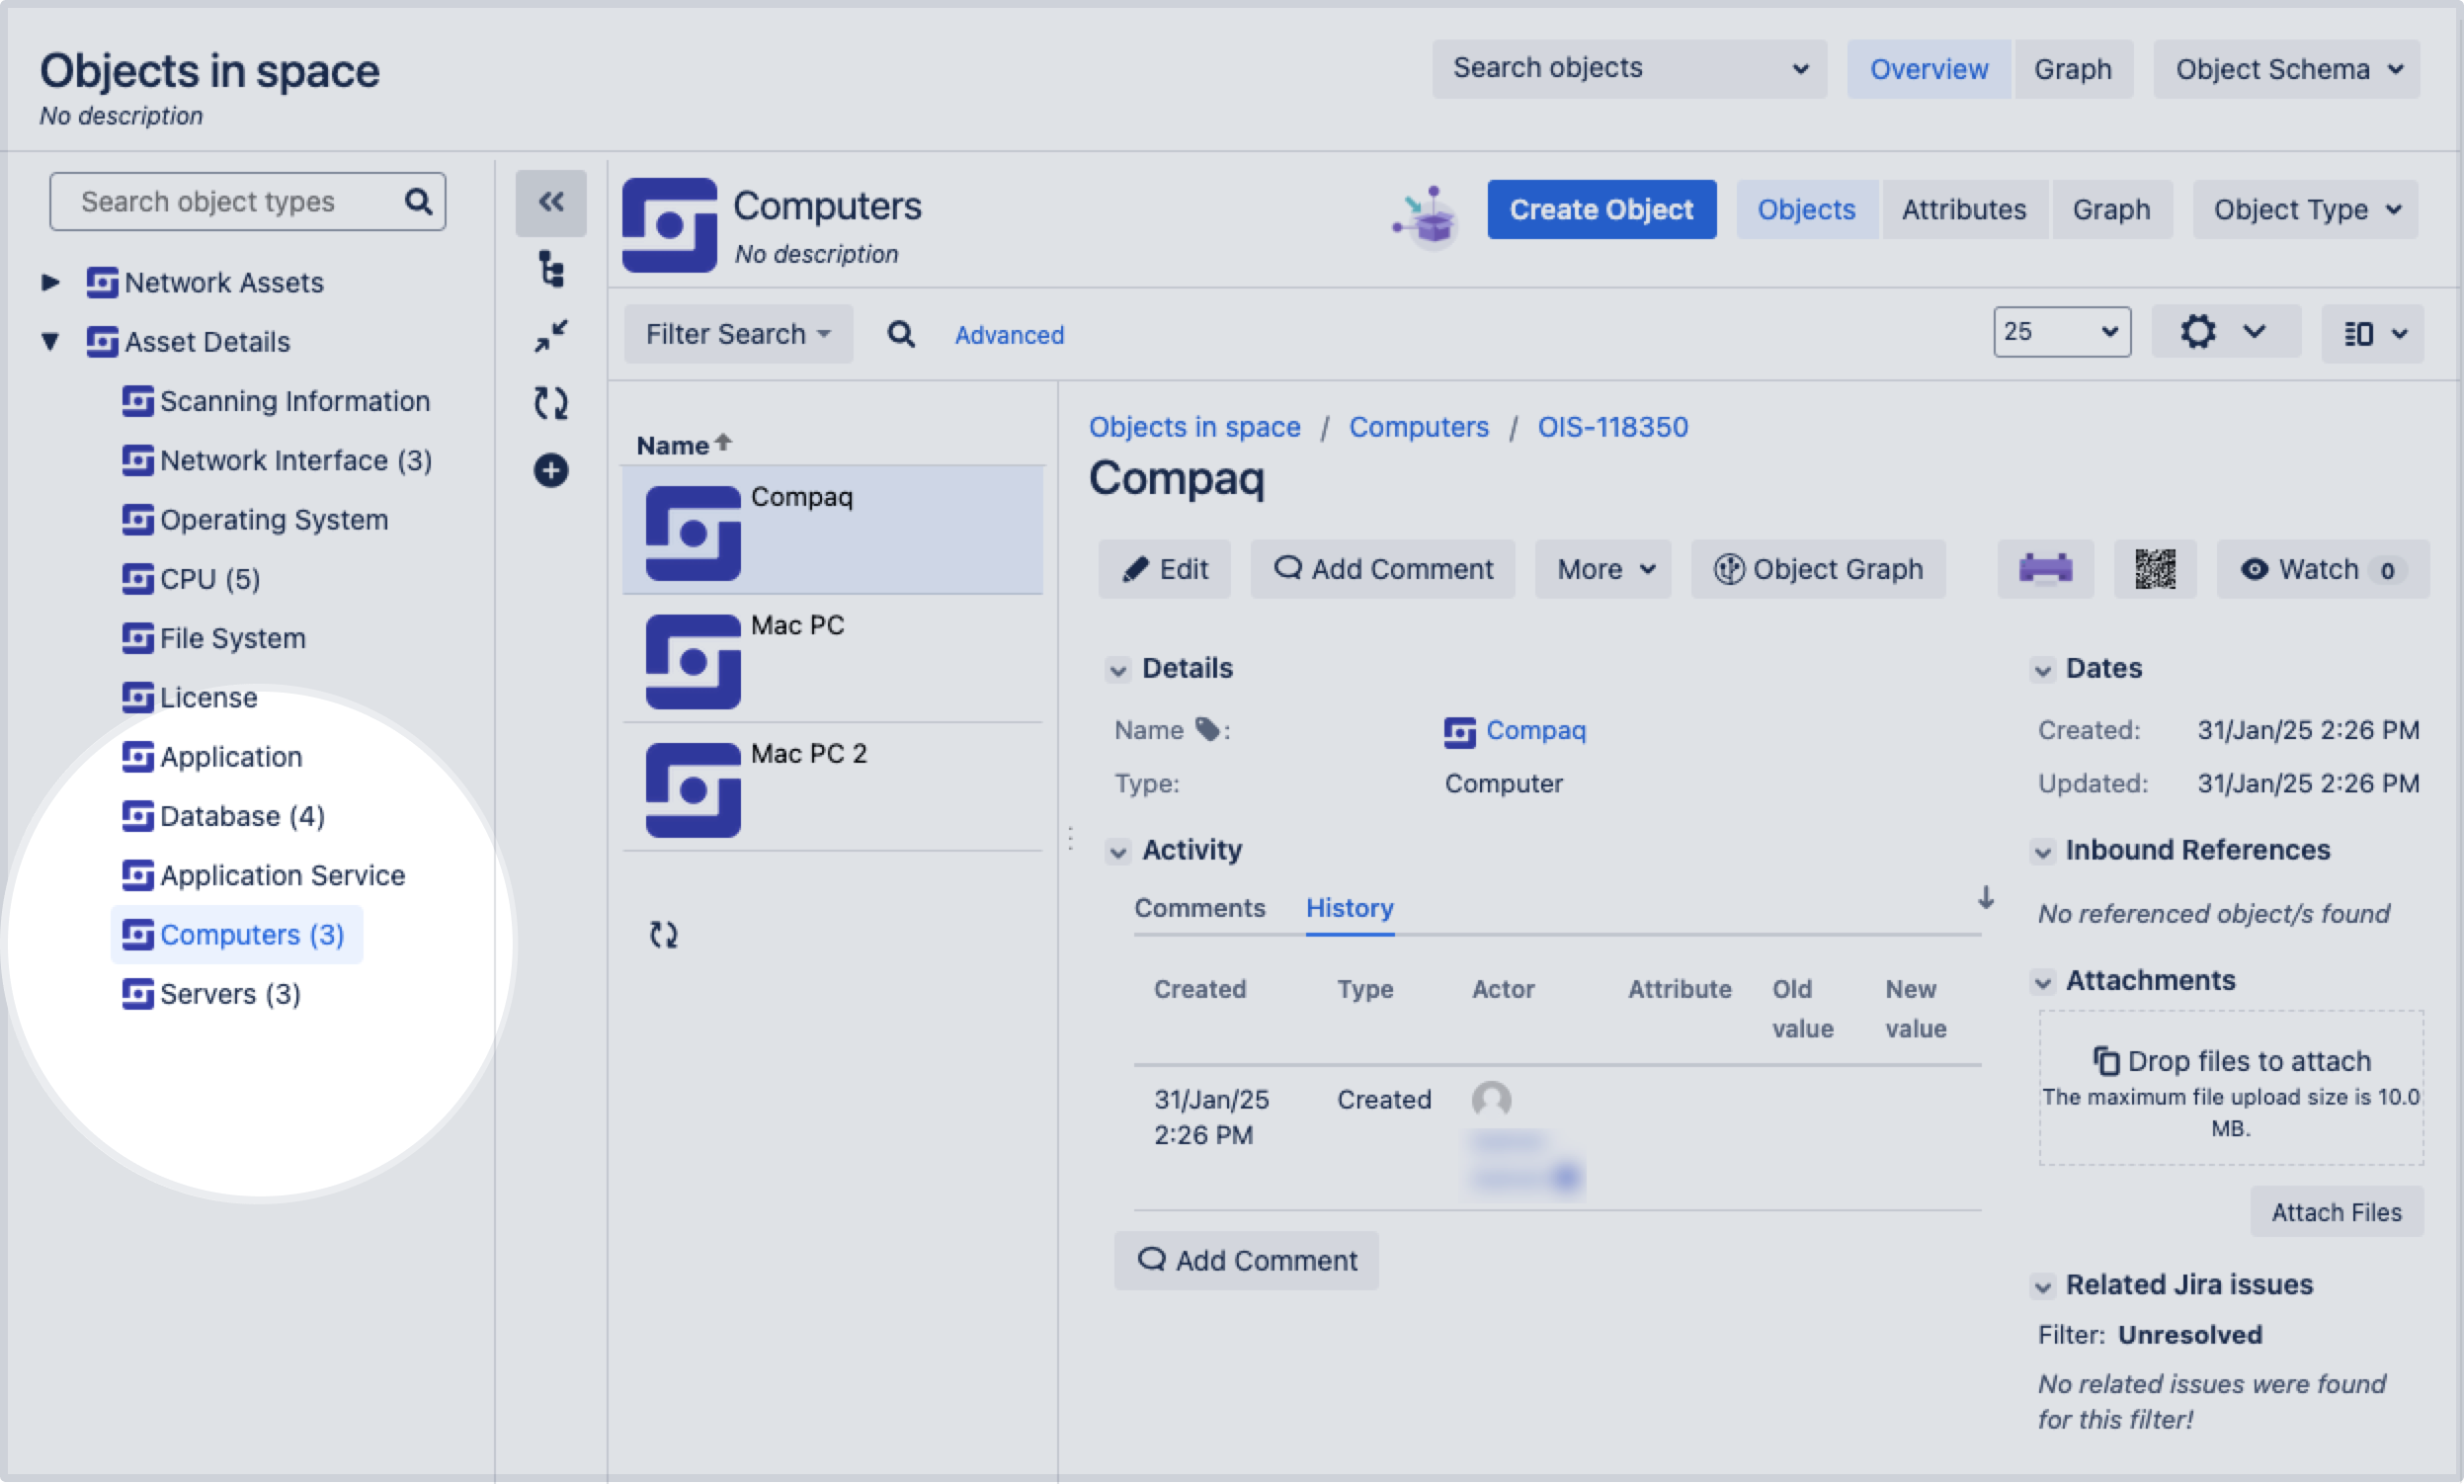
You might want to have two separate object types for this import data: Server, where you can see only server objects, and Computer, where you can see only computer objects. To split the data this way, you can map the objects according to the Type column of the CSV file.
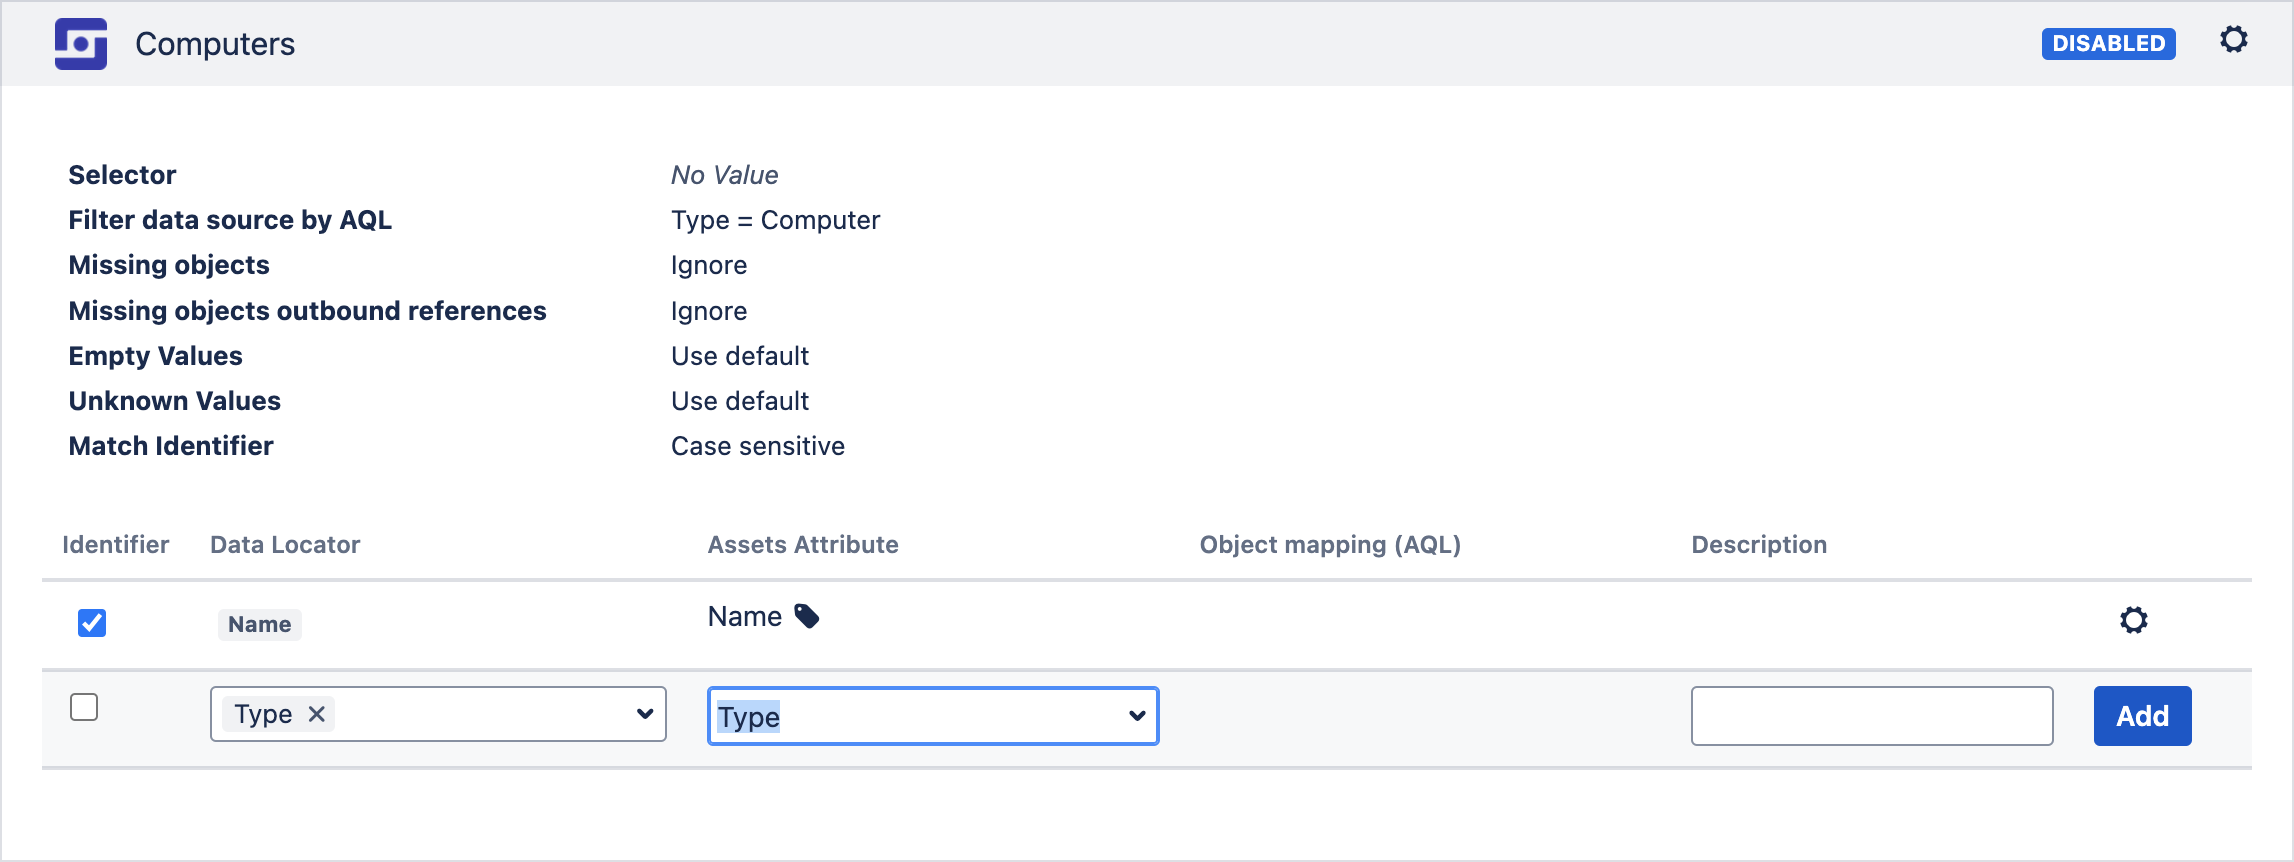
After splitting this import, you’ll see a configuration like this:
Preparing object types
Before splitting your import source of data, you’ll need to configure the object types to ensure your import data will be mapped correctly. For example, if your CSV file contains both Servers and Computers object types, you need to configure each type separately. To prepare your object types:
Create the object types if you haven’t done it yet. Read how to create an object type
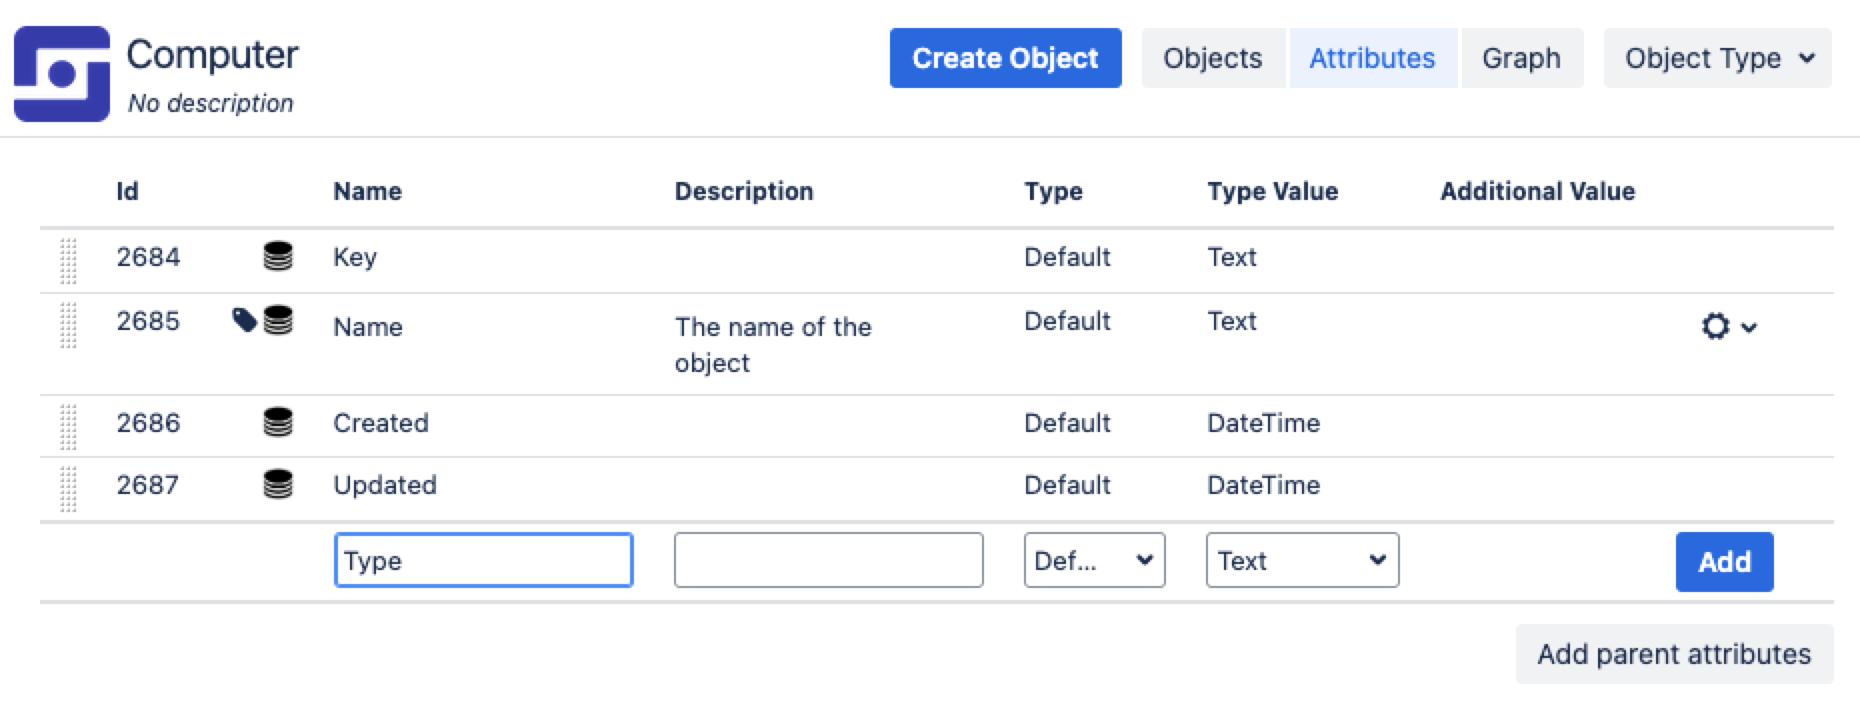
In the upper-right corner of your object type, go to Attributes.
In the Attributes tab, add an attribute that will separate object types in your import configuration. In our example, we want to separate computers from servers by the attribute Type.
You must add attributes to all the object types that you want to use to split your import data.
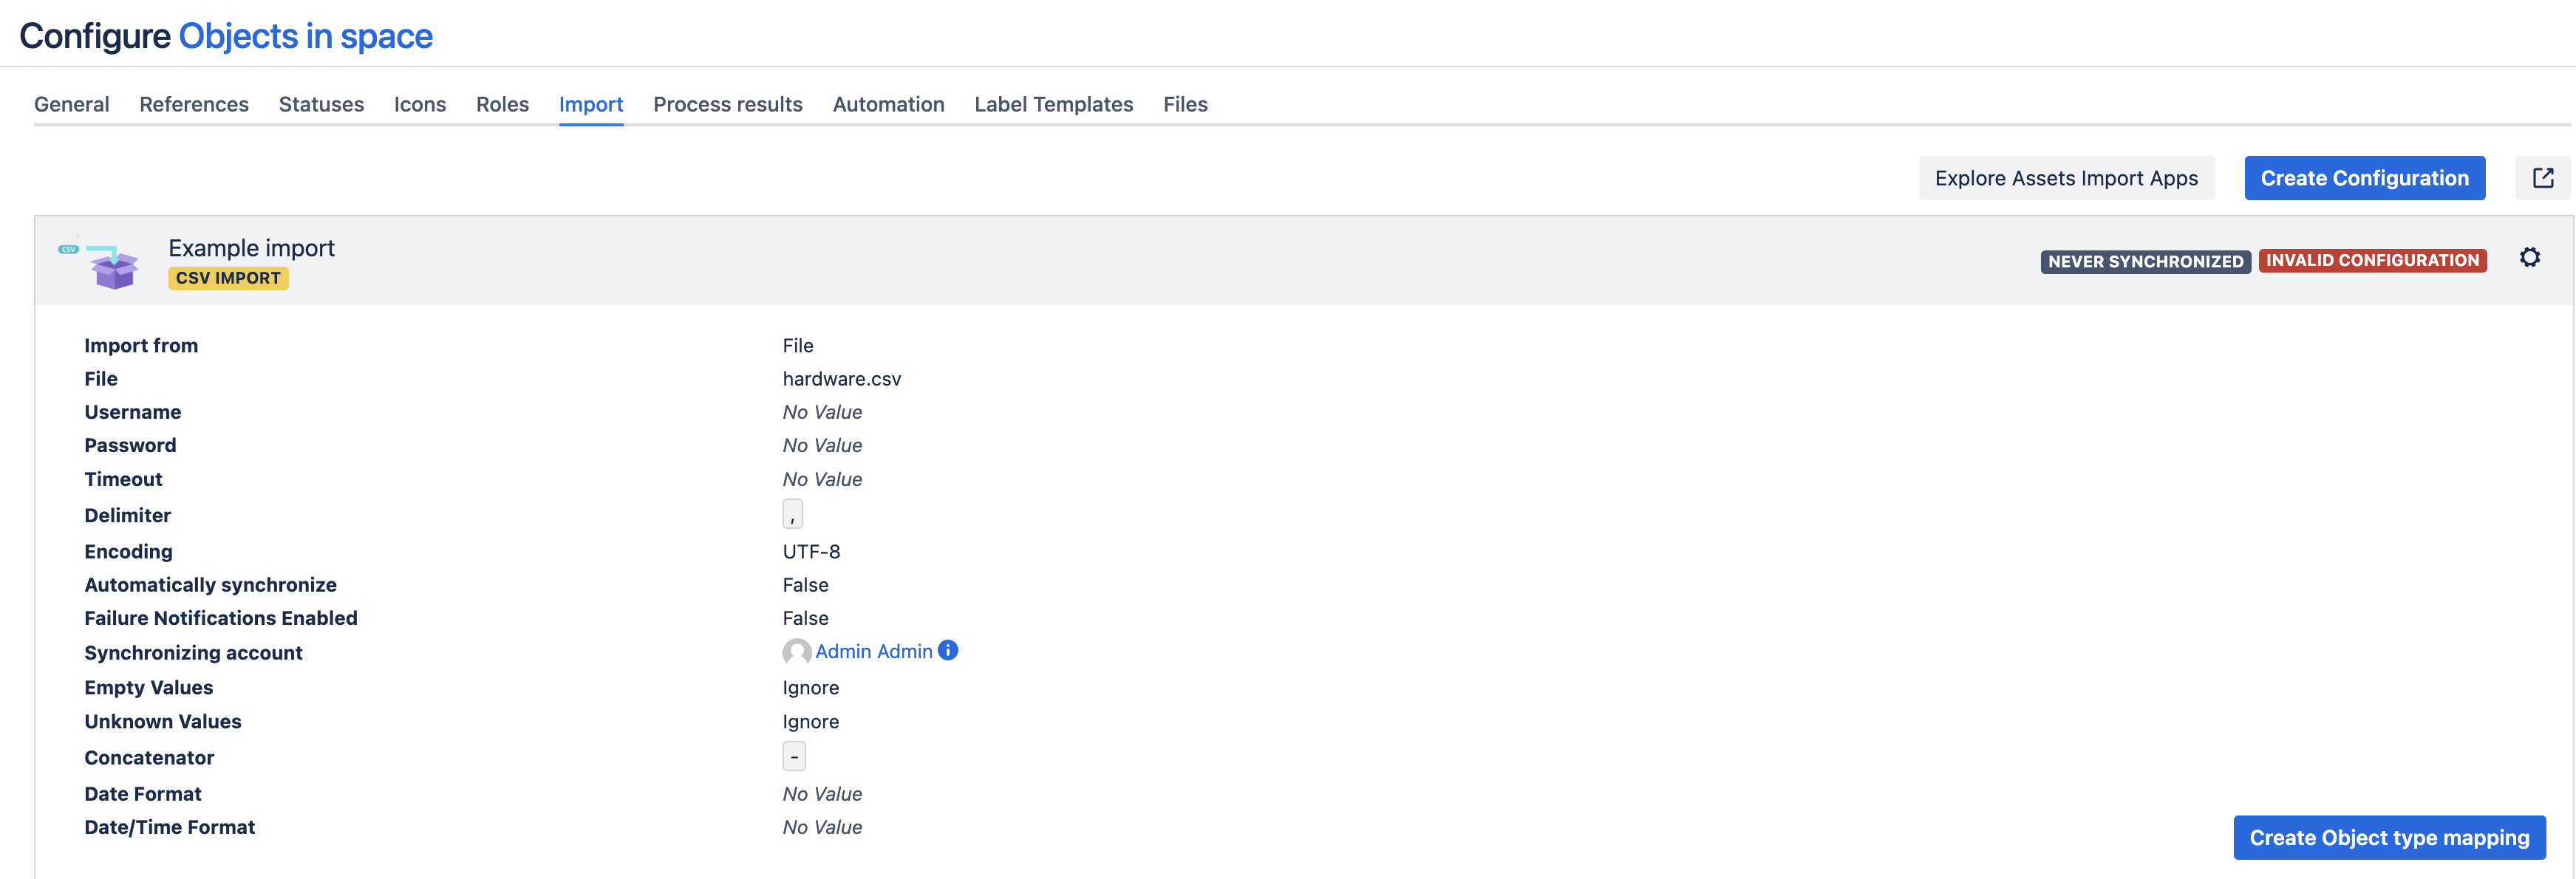
This enables Assets to read multiple object types from the same import source of data and map them to the appropriate object types. When your object types are ready, go back to your import configuration and create the object type and attribute mapping.
Creating object type and attribute mapping to split your data
In this step, you’ll map your data to object types and their attributes. You can create your own mapping or use the predefined structure and configuration. Explore how to create object type and attribute mapping
When the object type and attribute mapping are ready, you can split your import data by using the Assets Query Language (AQL).
Splitting import data by attributes
You can now split the data to be imported using Assets Query Language (AQL). For example, if you're importing data into the Computers object type, you can choose to import only computers and exclude servers.
You need to repeat the steps below for all the object types mappings you want to use to split your import data.
To split your data:
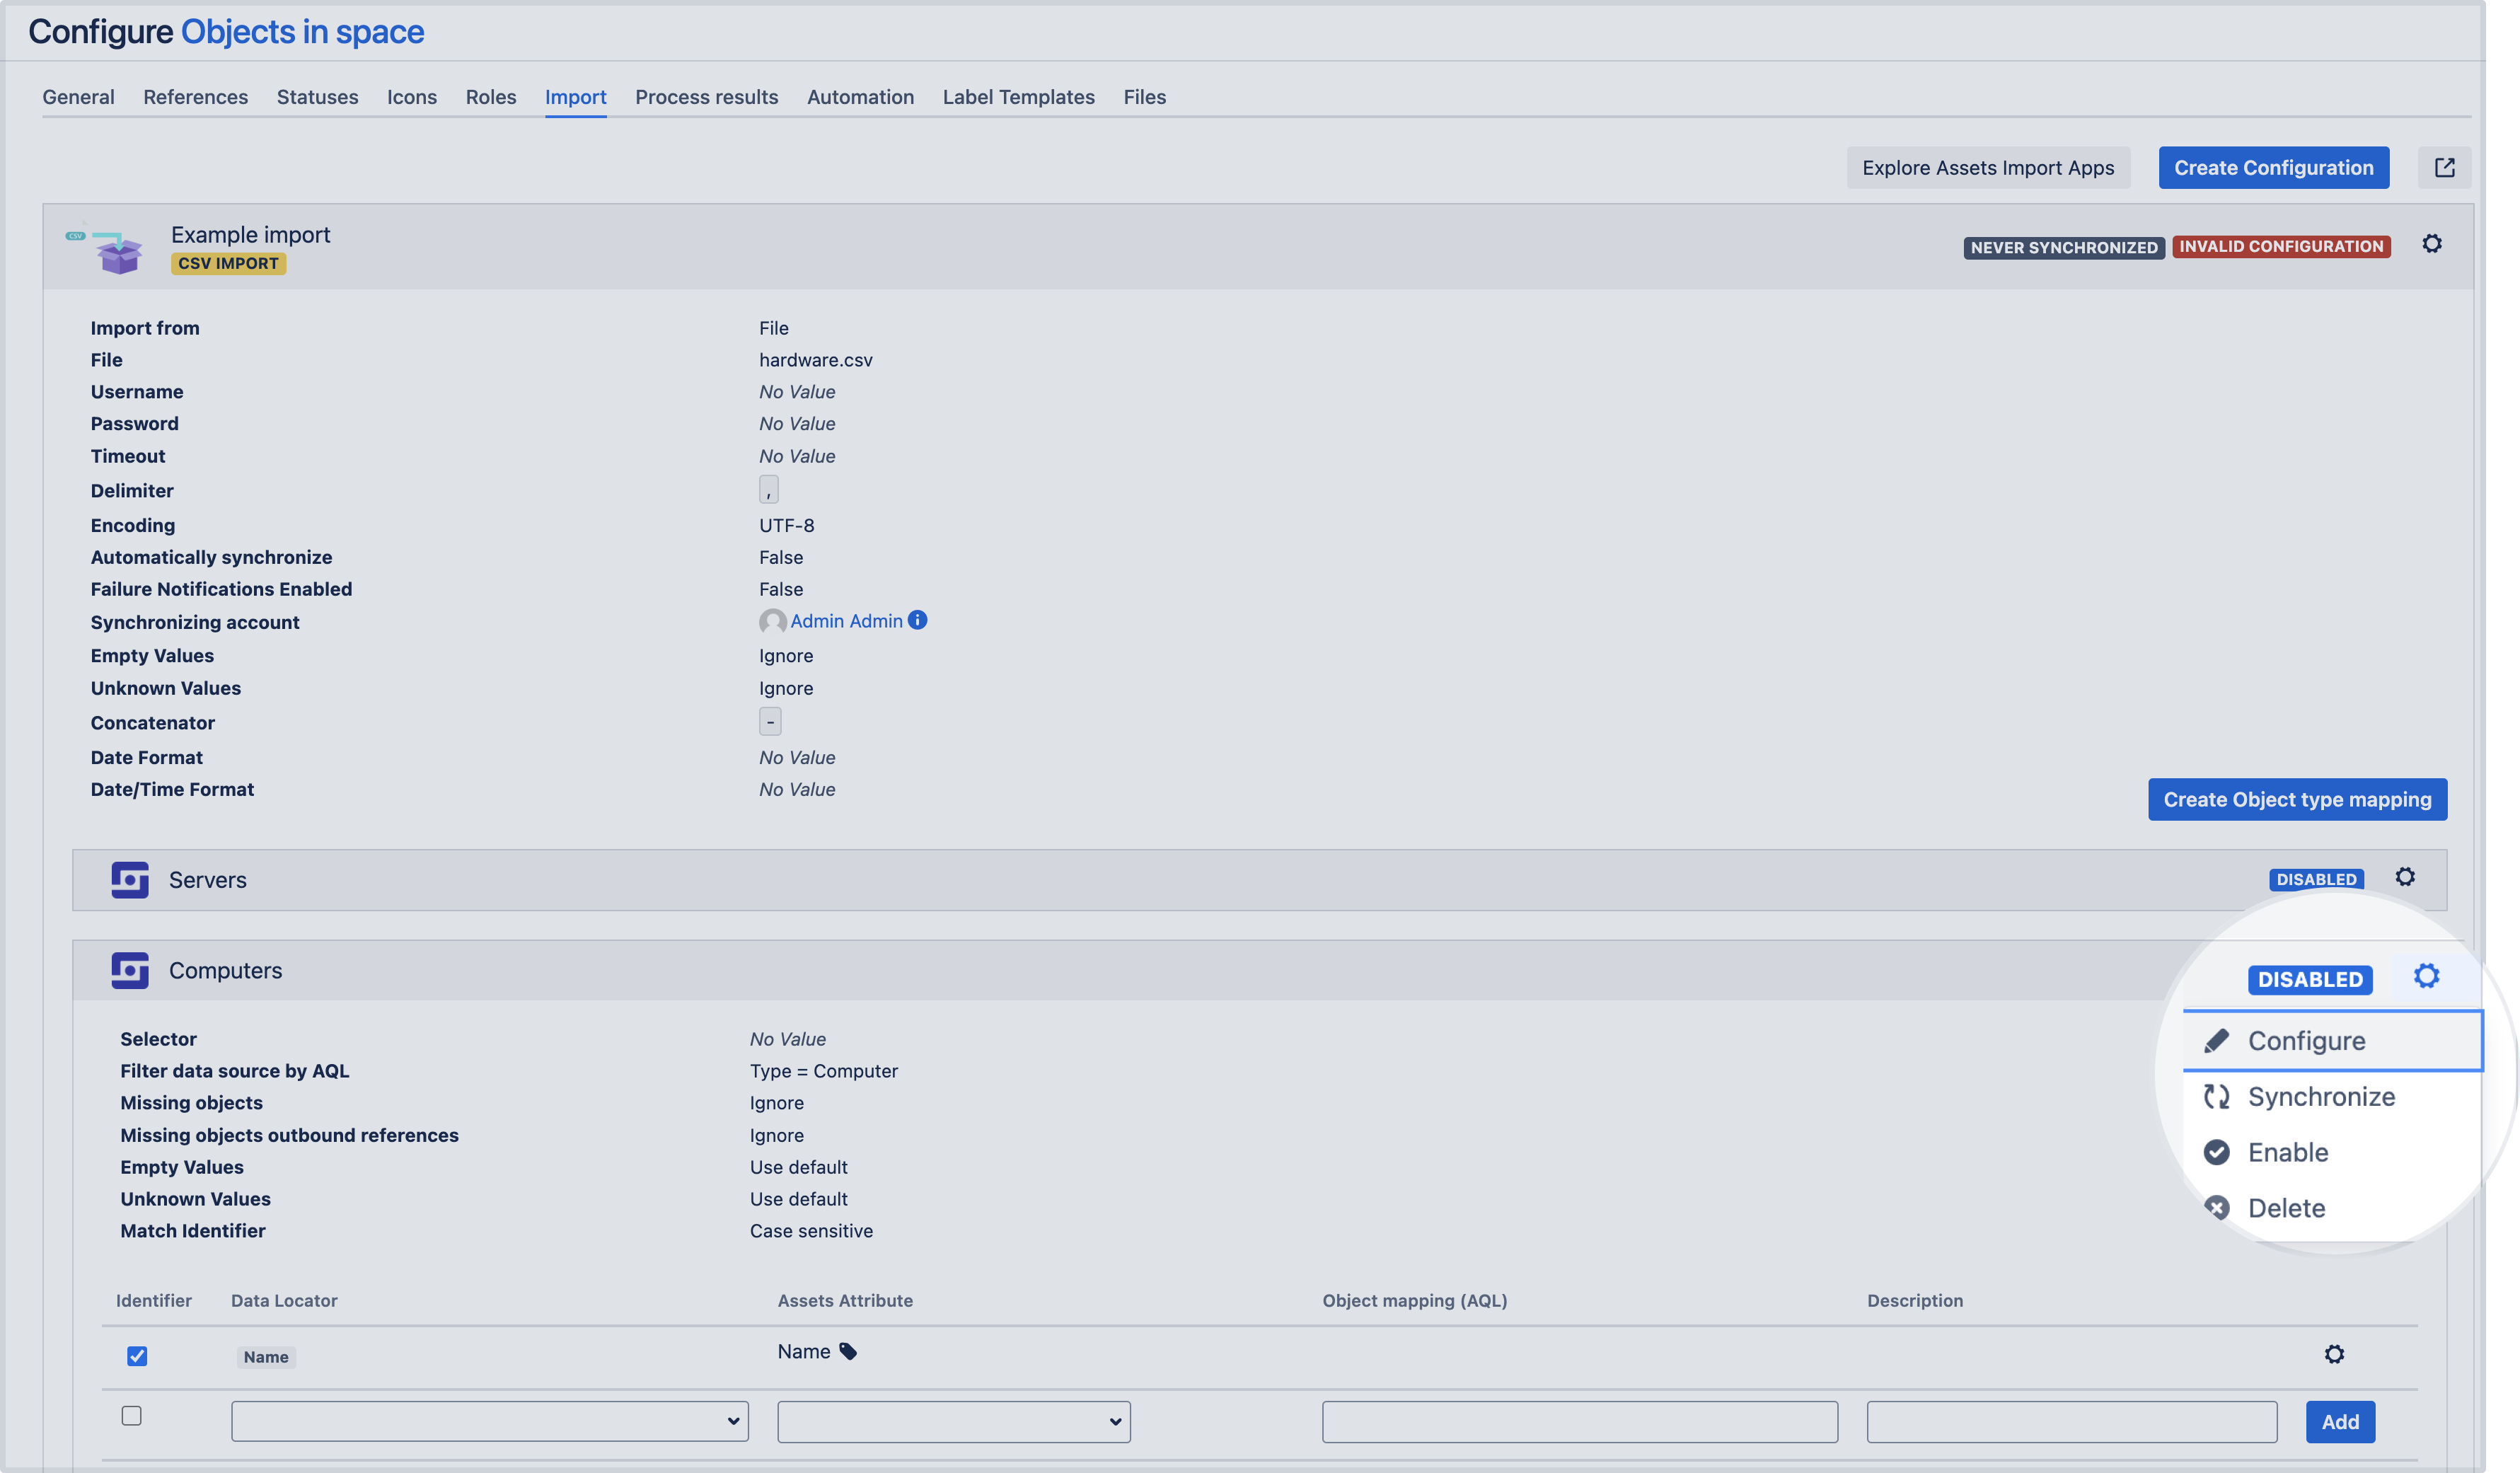
In your import configuration, open the object type mapping.
In the upper-right corner of your type mapping configuration, open Settings , then select Configure.
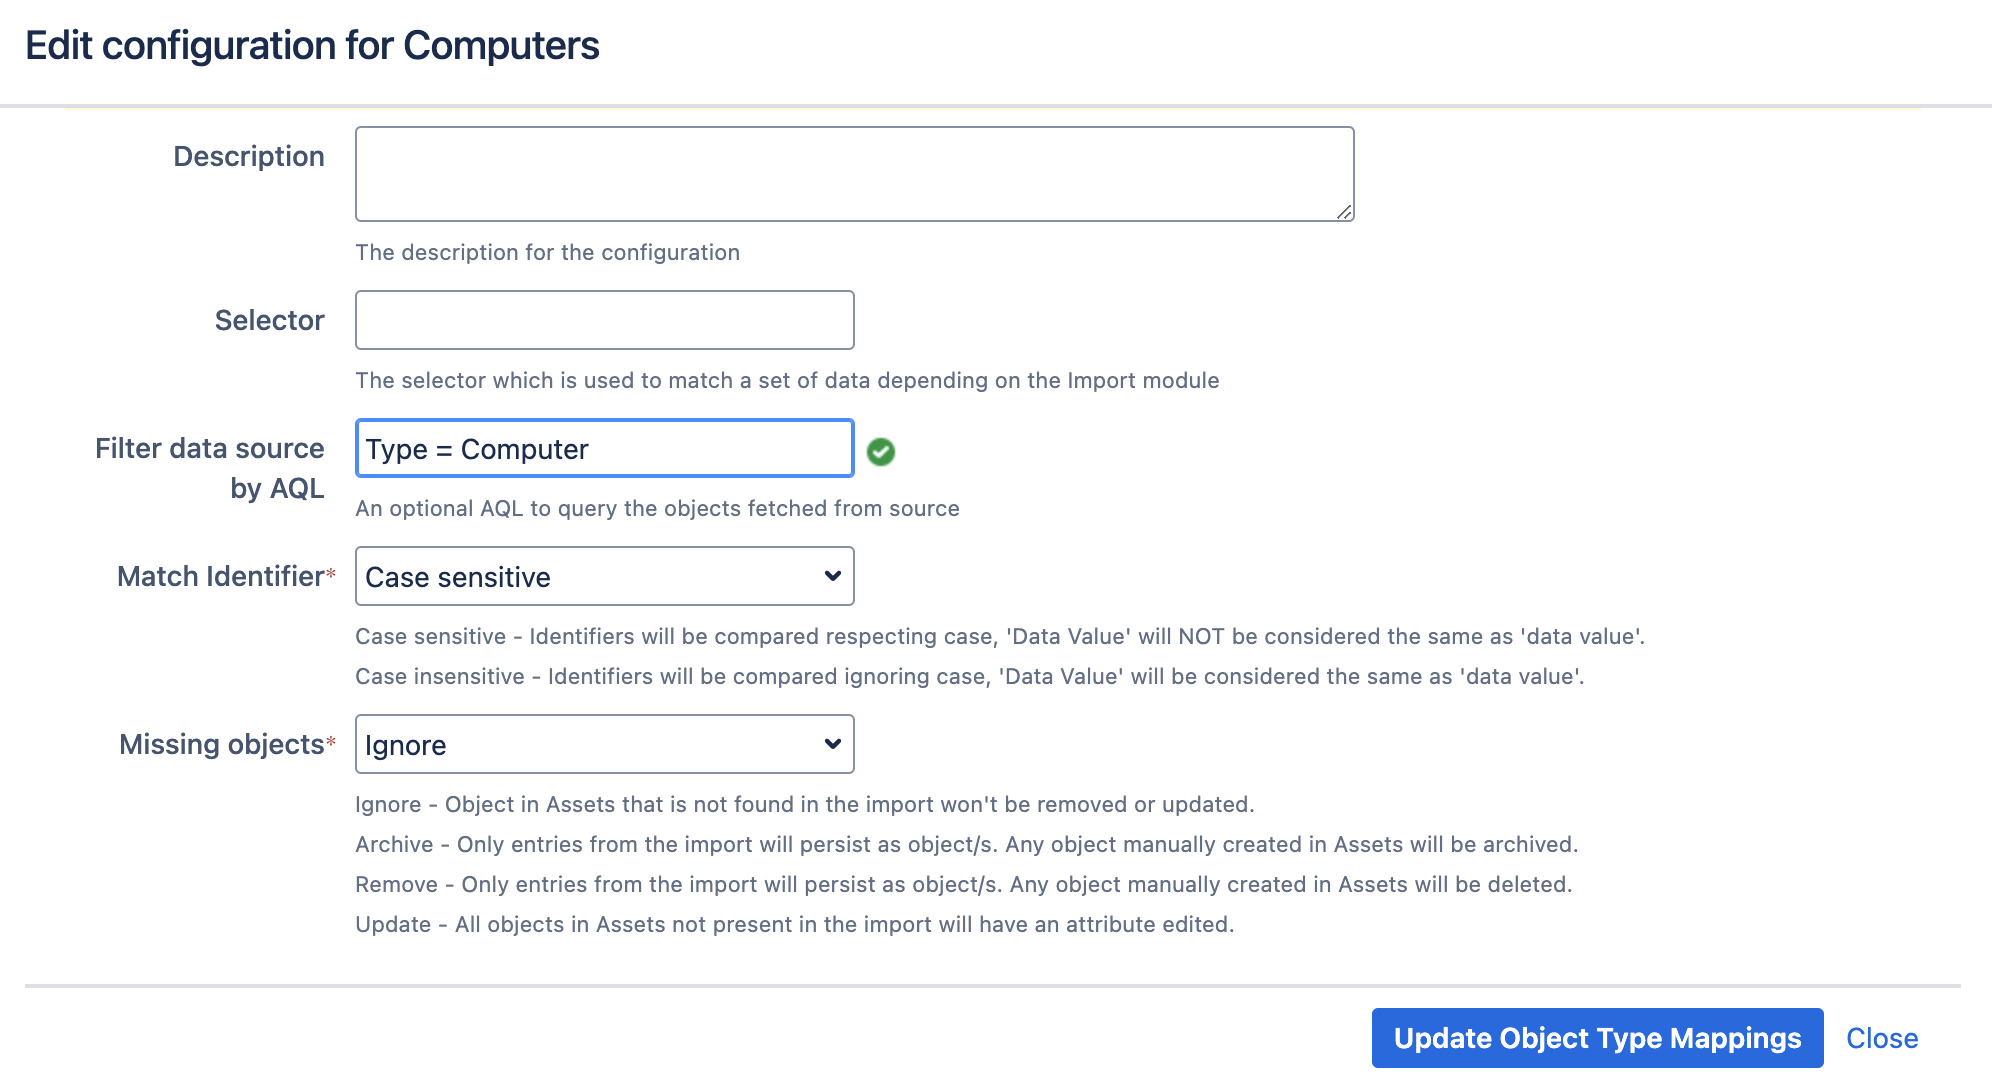
In the Filter data source by AQL field, use AQL to filter your import data.
For example, if you called your object type attribute Type, and you want to filter your import data by computers only, then your AQL filter would beType = Computer. Explore Assets Query Language (AQL)You can’t filter data based on the object references.
Select Update Object Type Mappings (or Create Object Type Mappings if this is a new mapping).
Define the locator of your object type mapping and select Add.
For example, if your import source of data includes a data locator (for a CSV file, it’s a name of a column) named Type and your object type attribute is also named Type, the object type Computers will filter the import data based on the information in the Type column.
Once you've set the AQL filter and added the data locator to the mapping, Assets will organize your import data and divide it into the specified object types. However, you won’t see the imported data yet. You still need to inspect and sync your import.
Next steps
When you're ready with your mappings, go to 3. Inspect your import configuration.
