Set up a knowledge base with Confluence Cloud
1. Set up a Confluence Cloud account
You’ll need a Confluence Cloud account to create the integration. Don't have an account? Try Confluence Cloud
2. Get the right number of Confluence licenses
Your service project agents will need a Confluence license to create and edit knowledge base articles. However, service project customers won’t need a license to view these articles.
Good to know
Read Confluence Cloud licensing and pricing to learn more.
3. Create a user with the right permissions to access Confluence
When integrating Jira Service Management with Confluence, you’ll need to choose a user that will be used to access Confluence. It’s important that this user’s permissions are similar to what you’d like customers to have.
Why are permissions important?
When customers search your knowledge base, they get results based on the permissions of the user you’ve chosen. If that’s an admin or someone with high permissions, customers might see results they shouldn’t have access to.
This will include the title and an excerpt of an article (that’s what’s displayed in the search). If an article is restricted, they won’t be able to view it as the article’s restrictions are checking permissions of a specific user who’s trying to access it. Nevertheless, it’s easy to reveal more than you’d like to, so make sure to set the permissions right.
4. Link Jira Service Management to Confluence
Who can do this?
Jira admins
Once you’ve covered the requirements on the Confluence side, it’s time to integrate it with Jira Service Management. That’s a one time action after which your project admins will be able to link their projects to spaces in Confluence.
Steps
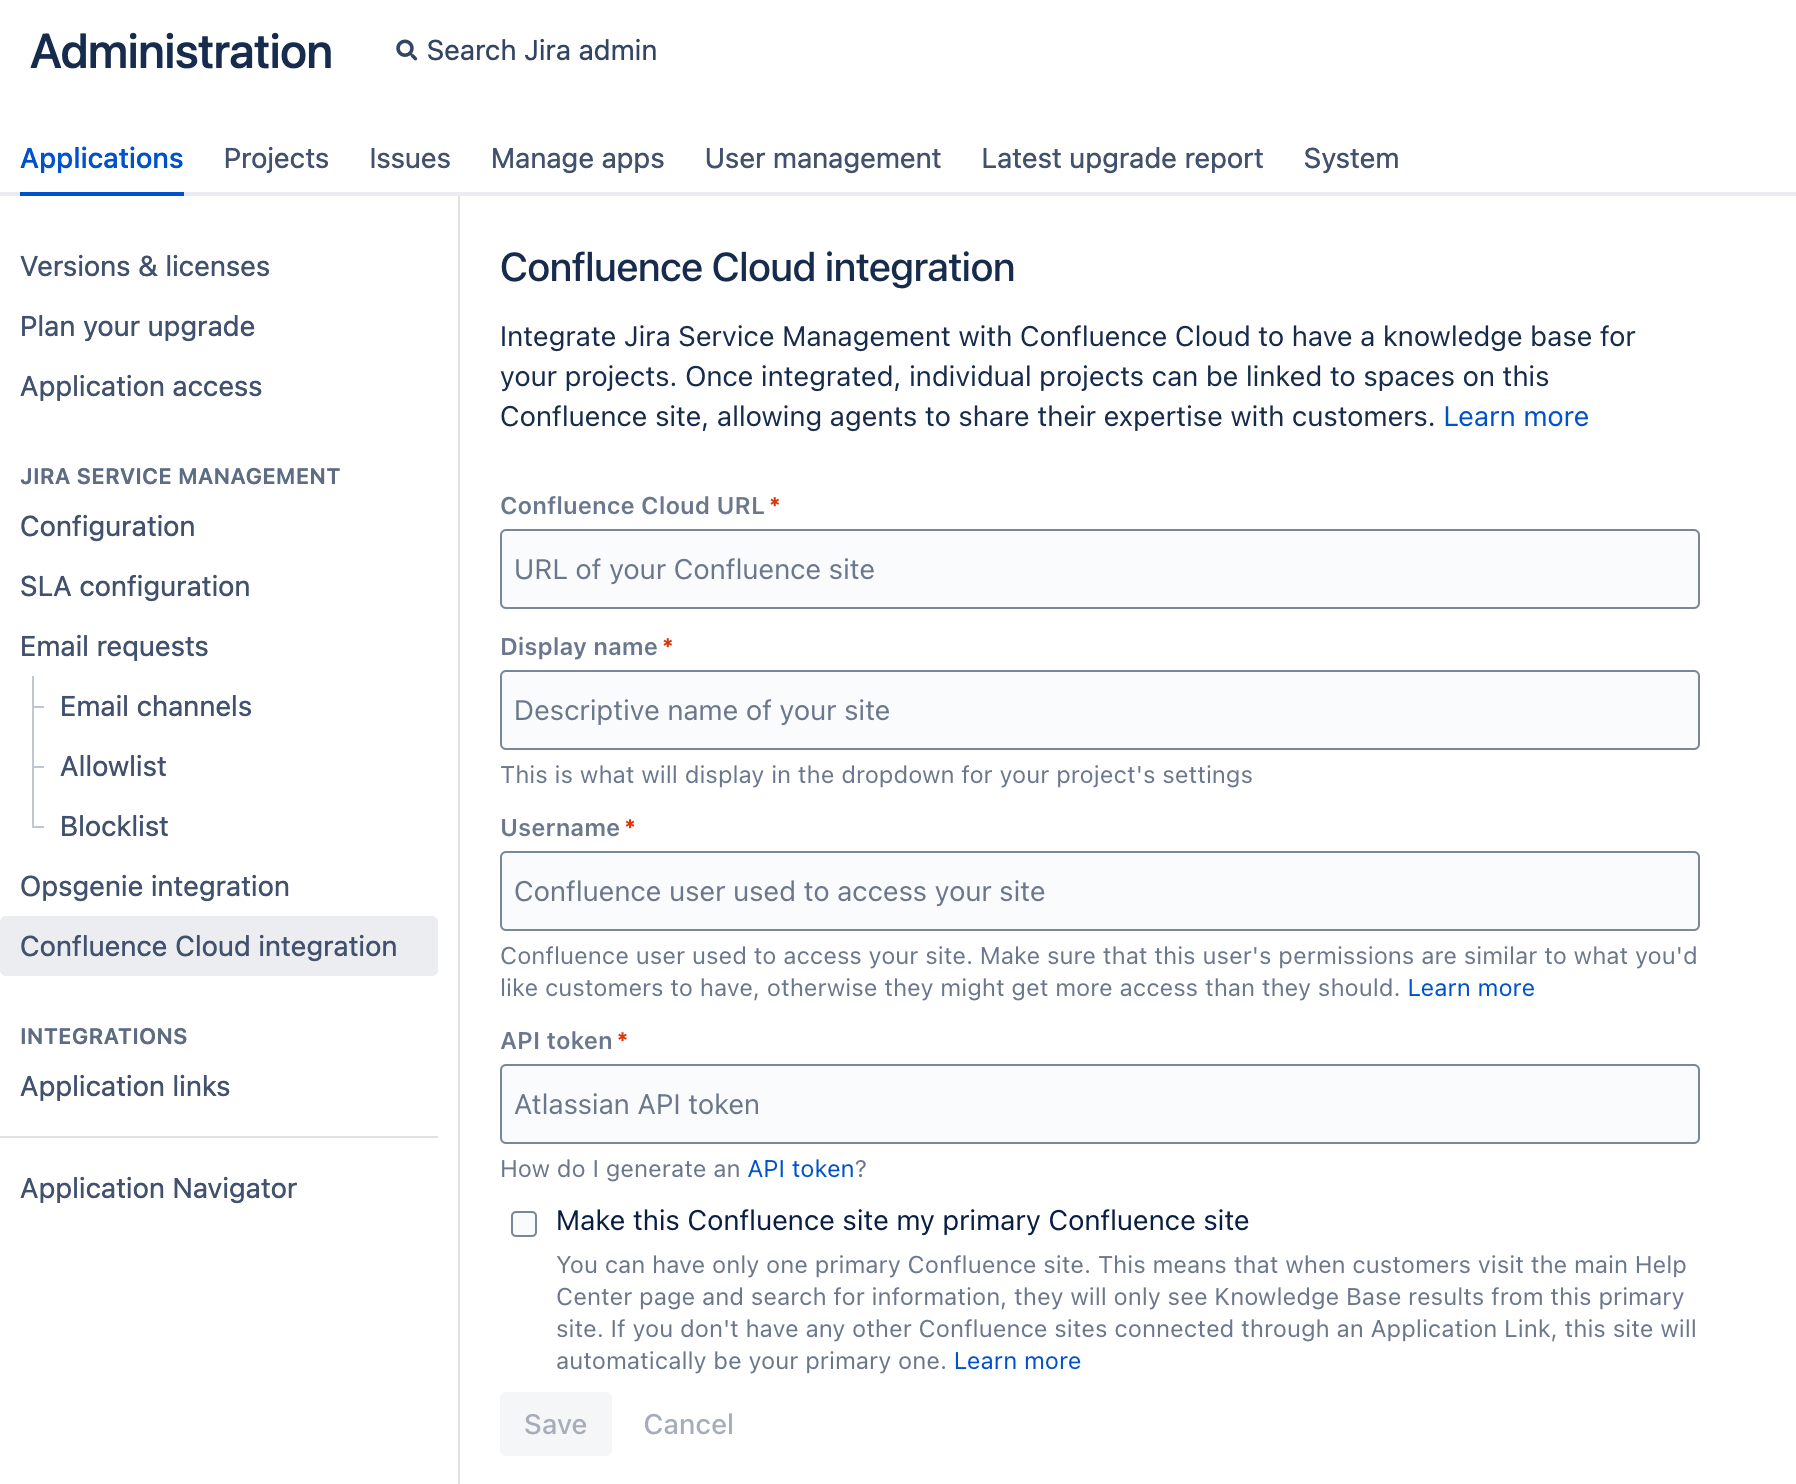
- Go to Jira Administration then Applications.
- From the sidebar, select Confluence Cloud integration.
Enter the URL of your Confluence site, including the
/wikisuffix, for example:https://confluence.atlassian.net/wikiEnter a descriptive display name. This is what project admins will see when linking their projects to Confluence.
Specify the user that will be used to access Confluence. Make sure to set the right permissions for this user, as described in the previous step.
Enter your Confluence API token. You can generate it from your Atlassian account. For more info, see API tokens.
(Optional) If you need, make this Confluence site your primary Confluence site.
Select Save.
Good to know
In the past, you might have created integrations with other applications through Application Links. Although this would still work for Confluence Cloud, using it as the knowledge base requires that you create the integration through the Confluence Cloud integration page. No AppLinks this time.
On the Application Links settings page, you can define which of the connected Confluence instances should be the Primary instance. From now on, you can use the Confluence Cloud Integration to override the Application Links settings specifically for Knowledge Base functionality. This means that customers accessing the main Help Center page will only see Knowledge Base results from the Primary Confluence instance when searching. Additionally, project administrators will have this setting as the default option when configuring Knowledge Bases in Jira Service Management projects.
5. Learn about knowledge base settings and permissions
The permissions you set in Confluence by the Confluence admin, and the permissions set by the project admin in Jira Service Management, determine whether (or not) your agents can create articles and if your customers can view them.
Read Knowledge base settings and permissions in Confluence Cloud to decide what you need.
6. Link your project to a Confluence space
Who can do this?
Project admins
When you link your service project to a Confluence space, agents can search for solutions and create new articles for common requests. Customers can then use the articles to self-service problems.
Before you begin
You need to create a space for your project in Confluence beforehand, as you can only link projects to existing spaces.
Steps
Go to Knowledge base then select Link space.
- In the Link space dialog that displays, search and select the space you want to link to.
You can only link spaces that you have permission to view, - From the Who can view list, set permissions to define who can view knowledge base articles.
You can also unlink or change spaces in the Linked spaces section from Project settings then select Knowledge base. Unlinking spaces only removes them from your service project. These spaces will still be available in Confluence.
Good to know
- You can link up to 10 spaces.
7. Write, search, and share knowledge base articles
Who can do this?
Agents
Once you've linked to a Confluence space, agents are ready to start writing and sharing knowledge with customers and teammates.
Read Write, search, and share knowledge base articles to learn how to do this.
