Object schema import
You can import structured data from an Assets object schema, such as Object Types, Attributes, and Objects. You can also import data from another schema on the same server, or from an object schema on an entirely different server. More about importing
Some use cases could be:
Synchronize two different servers, each running a different object schema.
Create a staging instance containing a subset of the full data from an object schema.
Synchronize data between a master server and a set of child servers that contain a subset of the full data.
You need to be an Assets Manager for an object schema to create, configure, and enable imports.
Skip to:
- Before you begin
- Importing object schemas
- Pre-defined structure and configuration
- Import configuration created
- Object type mapping
Before you begin
Here are some additional details that you might need to know to import an object schema:
This import type doesn’t include your schema's automation rules, roles, import configuration, object history, object comments, reports, and object-issue relations.
Because of the possibility that the two synchronizing servers might contain objects with the same name, to prevent an object collision, every object imported from another server is assigned an External Hash Key as an attribute. This hash key is built by appending the URL, schema ID, and the object key to create a longer, unique hash.
Importing object schemas
When you configure a new object schema import to retrieve assets from another instance or from the same instance, the import process regularly synchronizes to keep the data up-to-date. Assets will copy all object types and create mappings automatically.
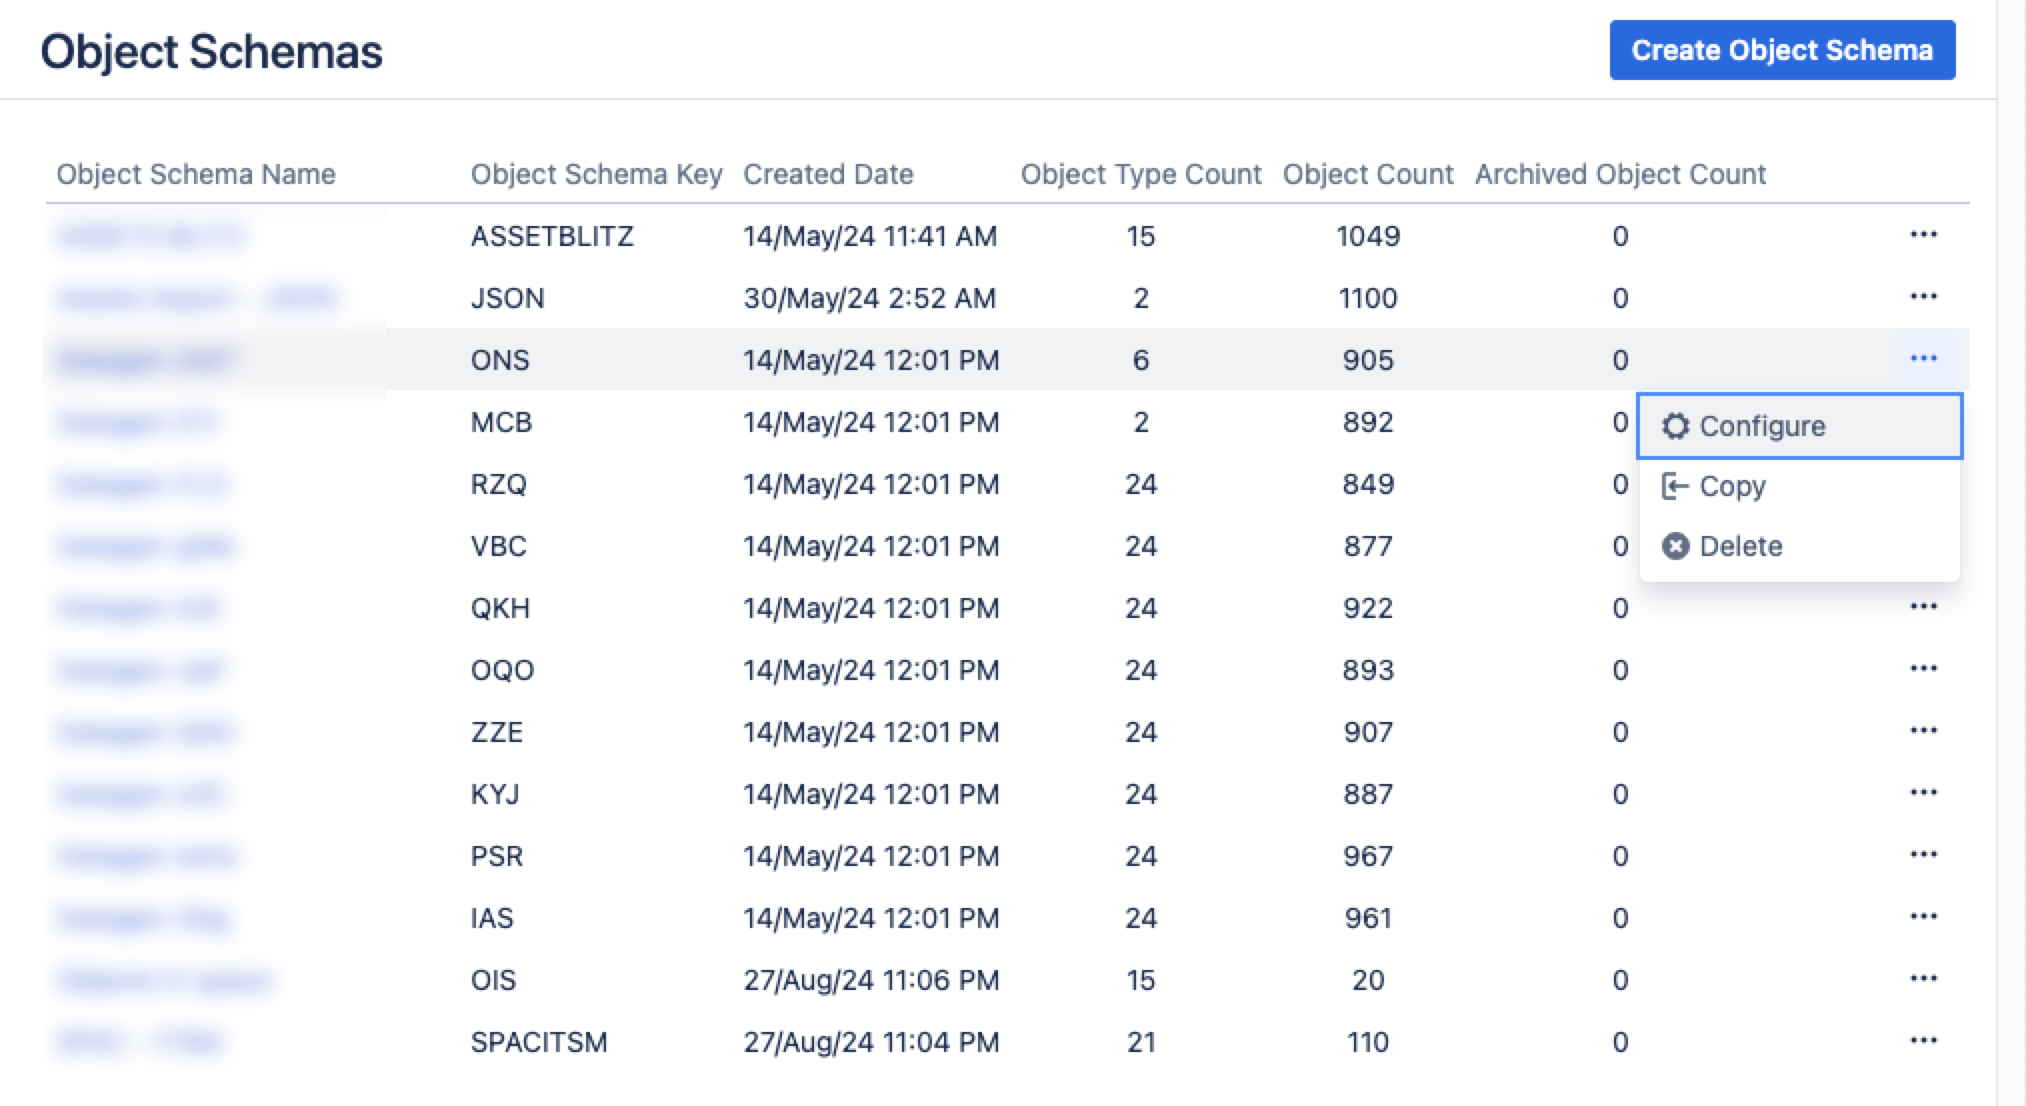
From your service project, go to Assets, then Object Schemas.
From the Object Schemas list, select More actions and then select Configure.
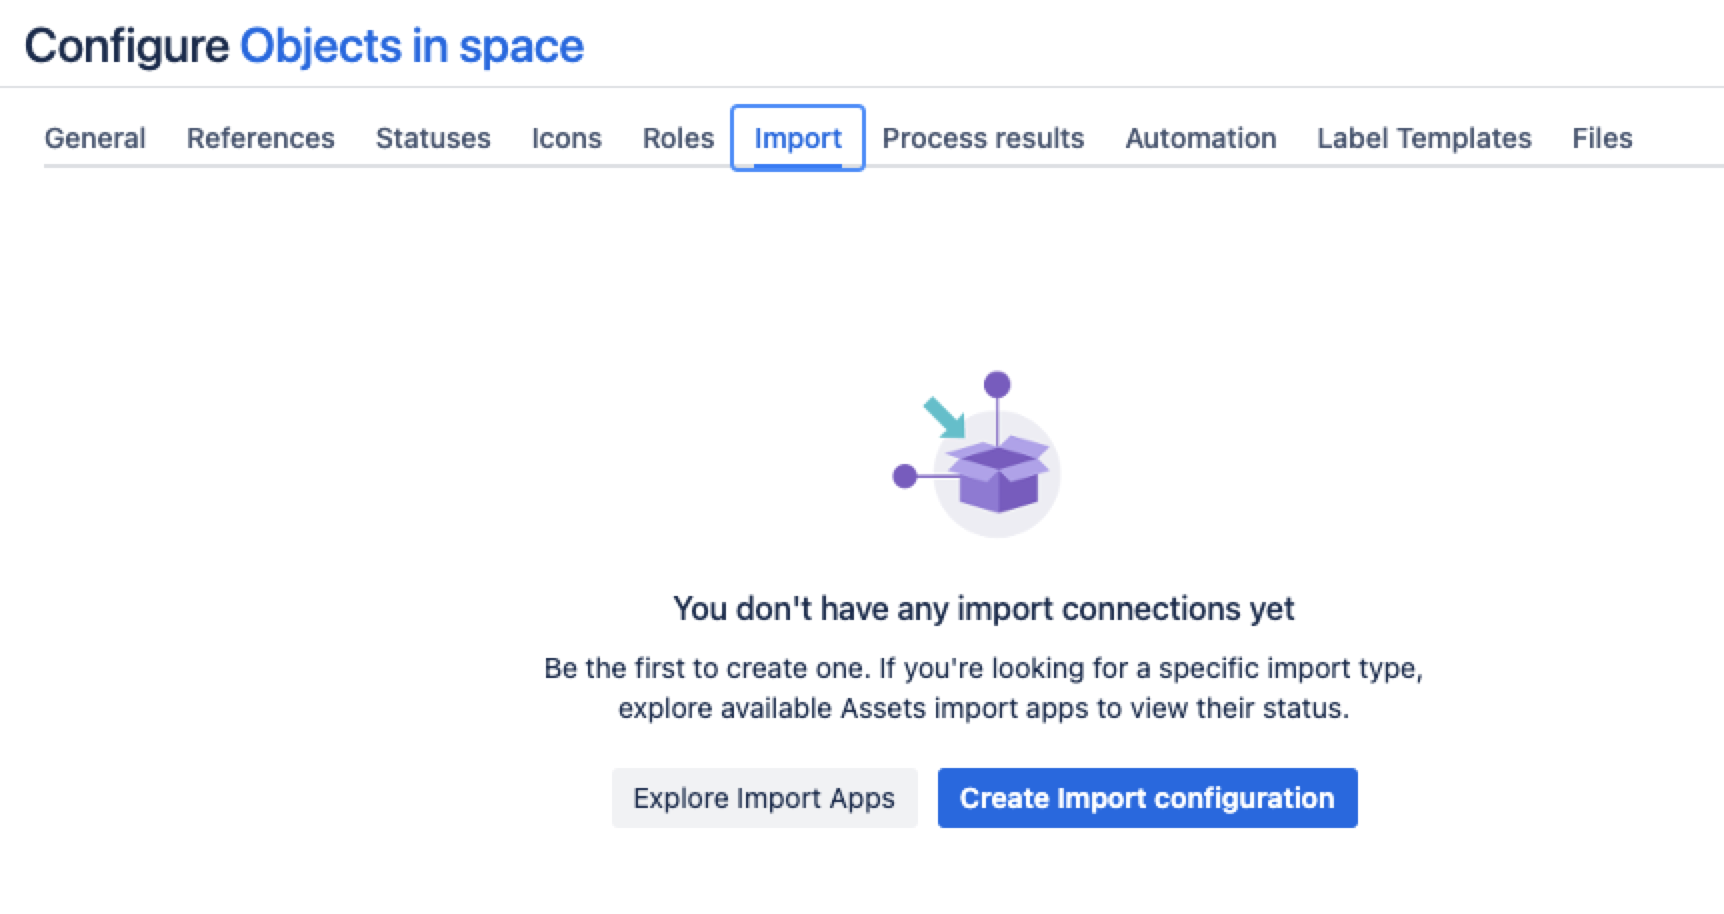
In the Schema configuration view, open the Import tab.
Under the Import tab:
If there’s no import structure, you’ll see the message “You don't have any import connections yet”. Select Create Import configuration to create a new import structure.
If an import structure has already been created, select Create Configuration.
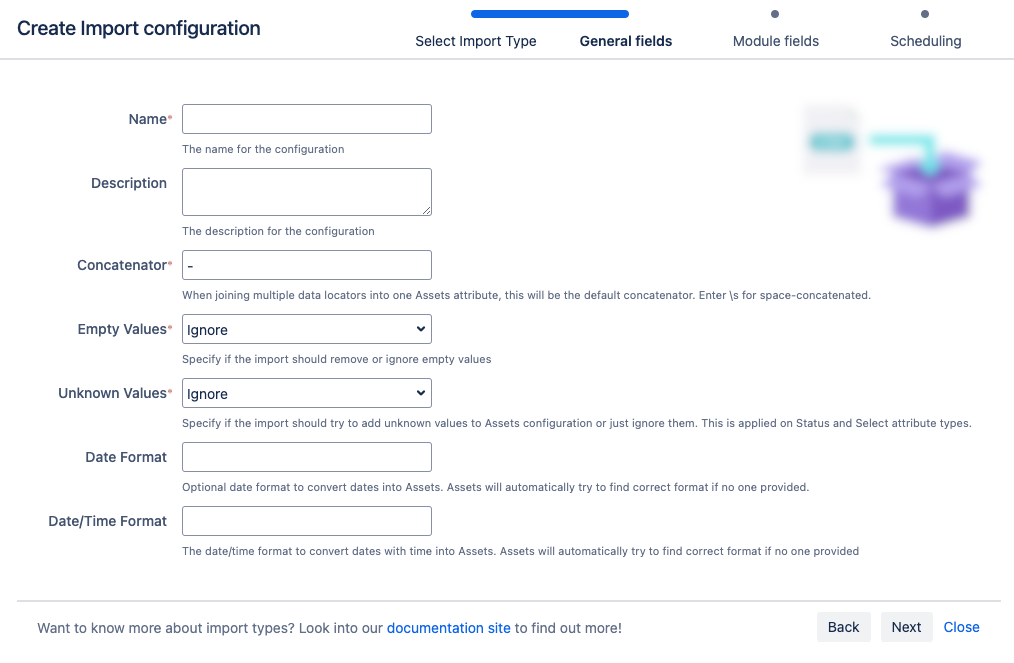
Select CSV import, then select Next.
Fill in the General, Module, and Scheduling import fields.
7. Select Save Import Configuration.
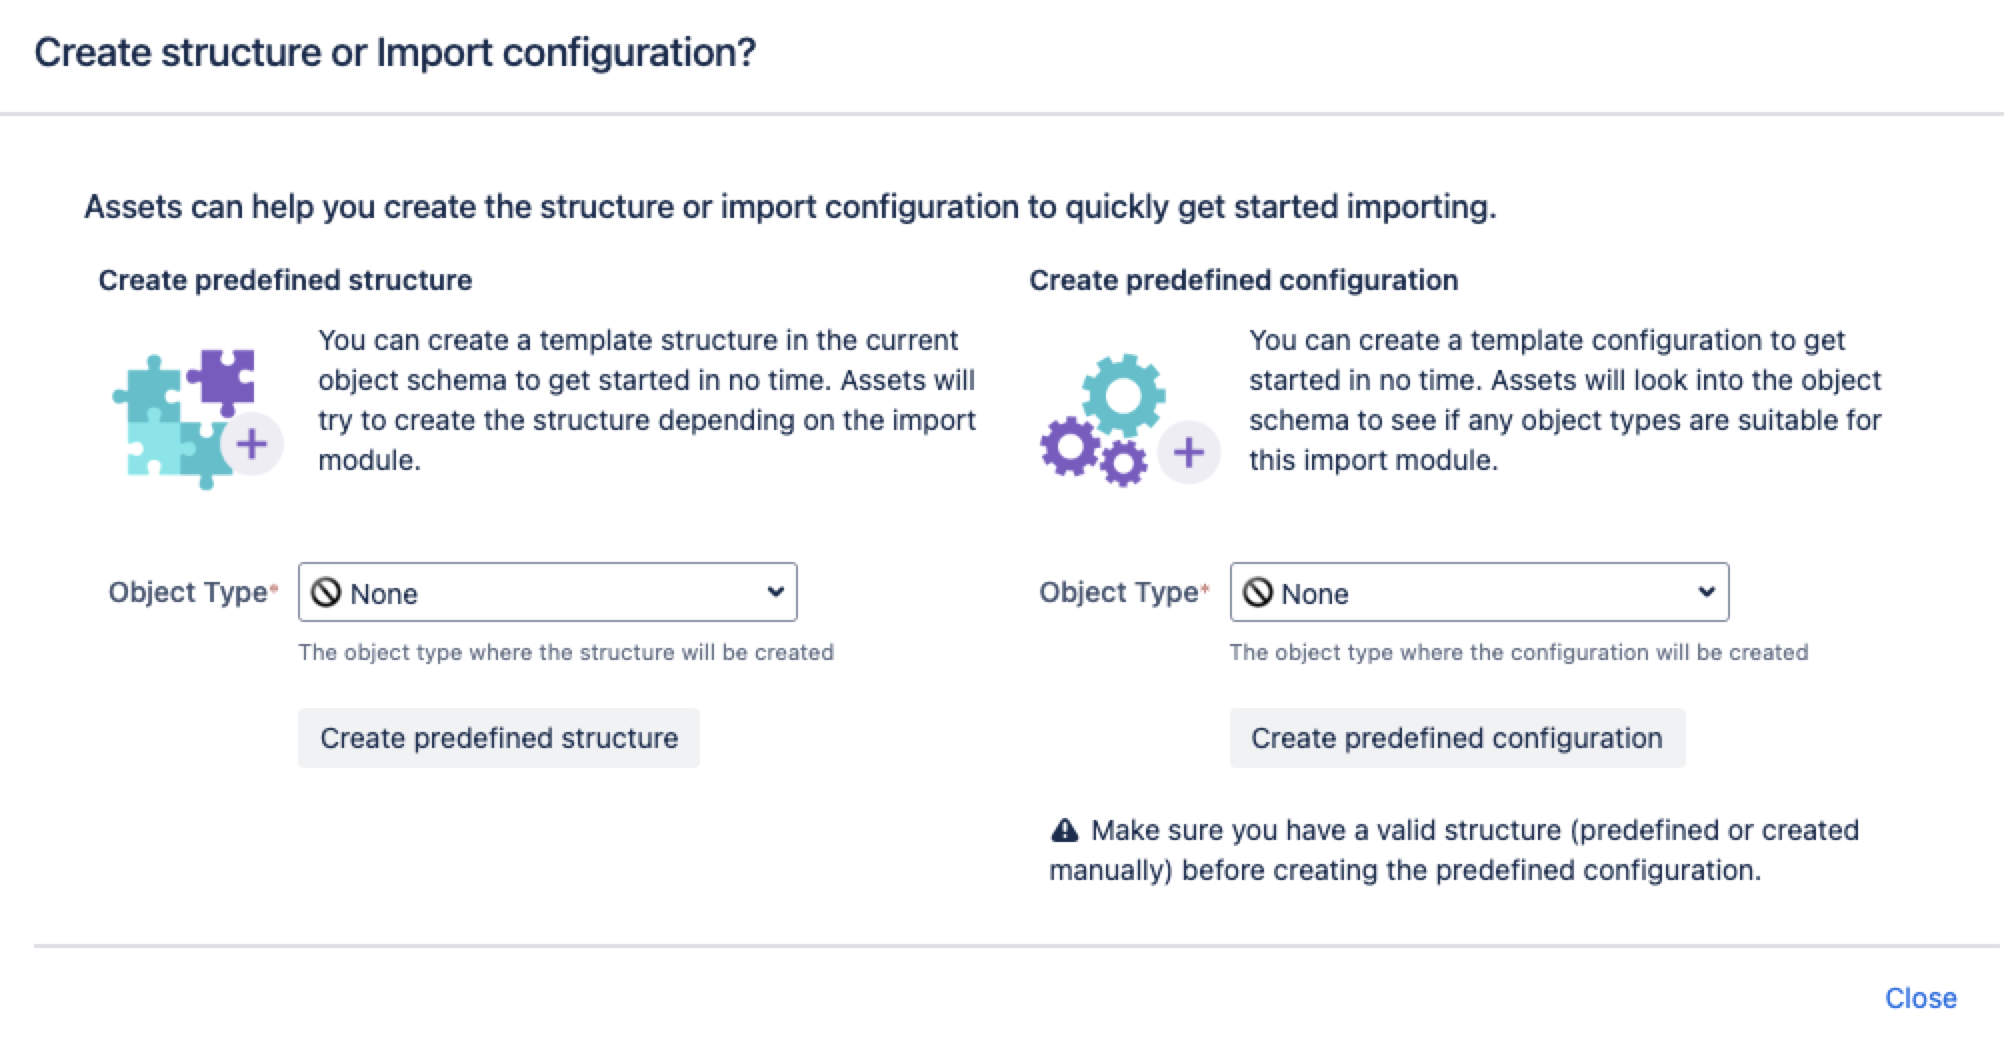
Next, you can create a predefined structure and configuration for your import.
Pre-defined structure and configuration
Create predefined structure – this will create object types with attributes and relationships in the schema
Create predefined configuration – this will create type mappings in the import configuration.
Additionally, for the object schema import, the predefined structure and configuration will be based upon the existing configuration of the target Assets object schema. Some object type mappings might be disabled by default. Ensure that all object type mappings are enabled.
Import configuration created
You can now view your import configuration, but it's not ready yet. You still need to map any object references or attributes between your source and Assets.
When you're ready, go to 2. Create object type and attribute mapping.
Before you go
Object type mapping
In the next step, you'll create the object mapping settings. Here are some settings specific to the object schema import type.
Name | Description |
|---|---|
Selector | The data locators are only available if you’ve indicated a Selector for the object type map. The Selector should be For example, if your |


