Dark Features in Confluence
Platform notice: Server and Data Center only. This article only applies to Atlassian products on the Server and Data Center platforms.
Support for Server* products ended on February 15th 2024. If you are running a Server product, you can visit the Atlassian Server end of support announcement to review your migration options.
*Except Fisheye and Crucible
Summary
Some of the features in Confluence are not enabled by default and may be implemented as Dark Features.
Certain advanced aspects of Confluence behavior might not have their configuration pages, being controlled by application properties or system properties instead. Additionally, some features and behaviors are usually hidden from users by default. These dark features can be turned on for an instance by the Confluence administrator. Dark features give advanced users the possibility to enable or disable specific functionalities.
Be careful with dark features as they may cause problems if misused since they will impact the entire instance. They should only be used when instructed to and preferably it should be tested on a lower environment when available. As always, a full backup is advised before making changes to Dark Features for the first time.
Managing Dark Features
To manage Dark Features you need to be a Confluence admin. It is possible through the link mentioned below:
- Go to
<confluence-url>/admin/darkfeatures.action
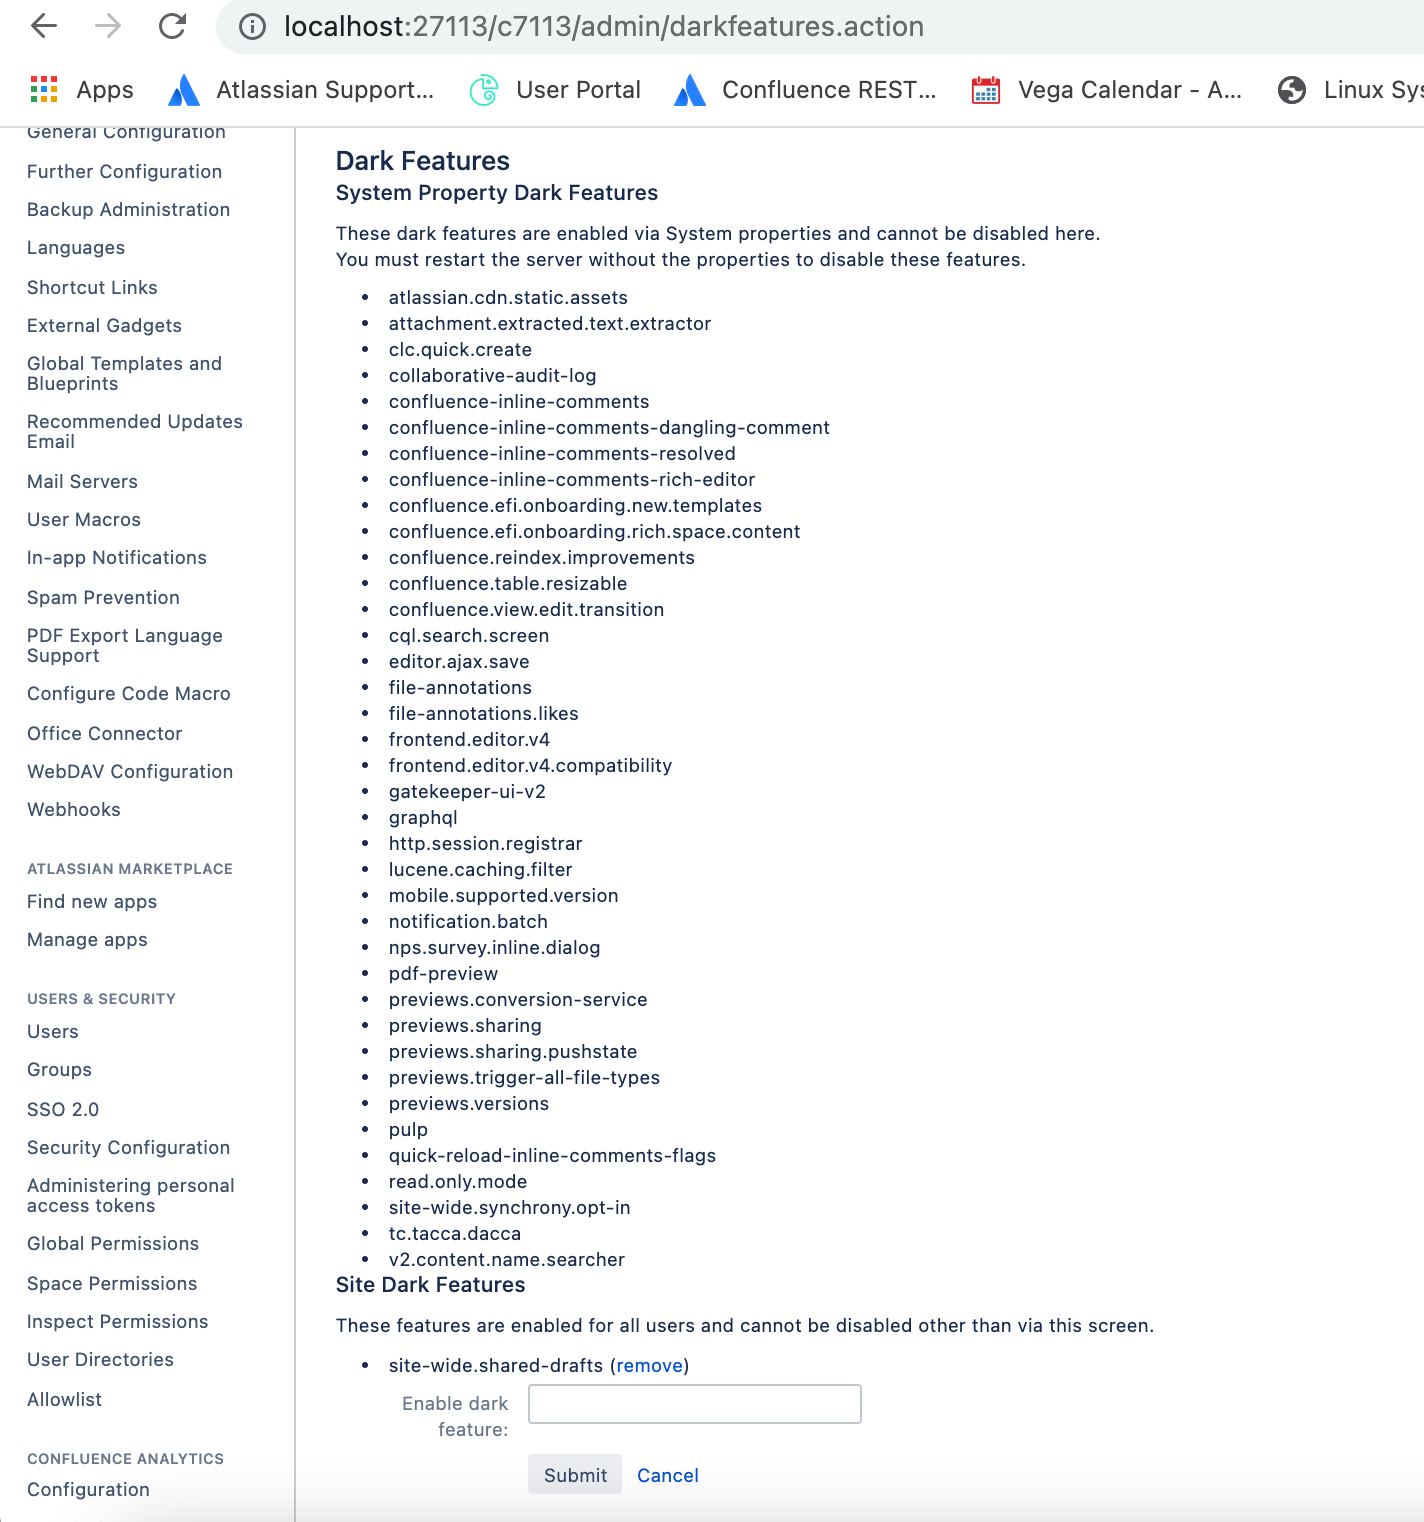
The Dark feature view looks like below.
Enabling a Dark Feature
In order to enable a feature flag, type in the Enable dark feature text area and click the Submit button.
e.g. To revert to Edit in Office functionality:
- Go to
<confluence-url>/admin/darkfeatures.action - Add the
enable.legacy.edit.in.officedark feature flag and select Submit.
You need to be logged in as an administrator to do this. Once you enable the dark feature, you can see them on the <confluence-url>/admin/darkfeatures.action page as shown below.
If you want to view the dark features enabled by admin through a DB query, please run the below query. The BANDANAVALUE column will give you the list of dark features.
select * from BANDANA where BANDANAKEY = 'confluence.darkfeature';Database Enablement Option
As with all recommendations made by Atlassian Support, please follow best practices for Change Management and *test and validate* these settings in a Test or Development environment *prior to* deploying any changes to a Production environment. This allows for the validation of these changes while minimizing the risk and impact to end users.
An alternative method for enabling the Dark Features can be achieved directly through the database. As with any modifications involving the database, we strongly encourage you to capture a safety backup prior to proceeding with this method. With that in mind, we can take the following steps to enable a dark feature via the database:
- Stop the Confluence application
- Perform the following query against the database:
select * from BANDANA where BANDANAKEY = 'confluence.darkfeature';- Copy the full resulting list from the bandanvalue column. The results from my test instance, which only had the site-wide.shared-drafts feature enabled, returned this:
<string>site-wide.shared-drafts</string>- Using that output of the first query (so that we make sure to include the other enabled dark features), we want to create an update statement like so using the name of the dark feature being enabled.:
Update BANDANA
set bandanavalue='<string>site-wide.shared-drafts,dark.feature.here</string>'
where BANDANAKEY = 'confluence.darkfeature';
The example above is factoring in the output that I mentioned in the previous bullet point, ie, the result of the query. Please replace dark.feature.here with the actual dark feature being enabled.
- Run the update query against the database
- Query the bandana table to make sure the feature is listed:
select * from BANDANA where BANDANAKEY = 'confluence.darkfeature';- Restart Confluence
Disabling a Dark Feature
To disable a feature flag:
- Click Remove link next to the specific feature flag in the left section (as shown on the screenshot below)
- You can also use the following SQL to disable the dark feature. The Confluence cache will need to be flushed after that.
Please take a backup of the DB table before doing the deletion. Below query will delete all dark features.
delete from BANDANA where BANDANAKEY = 'confluence.darkfeature';- If you have multiple dark features enabled, you need to use the below queries.
select bandanavalue from BANDANA where BANDANAKEY = 'confluence.darkfeature';

--Result in my local instance
<string>site-wide.shared-drafts,cql.search.screen</string>

E.g. I need to remove cql.search.screen

Update BANDANA
set bandanavalue='<string>site-wide.shared-drafts</string>'
where BANDANAKEY = 'confluence.darkfeature';


