Tables

Confluence tables allow you to present important information and discuss it with your team. Use familiar table formatting options like resizing columns, coloring cells, rows and columns, aligning content, and table sorting by clicking the column headers to view the information the way you like it.

Using Confluence Cloud? Check out our info on the new Confluence Cloud editor if your table looks like this one.

Screenshot of a table as it appears in the Confluence Cloud editor.  It has three columns and three rows.

Insert a table

To create a table:

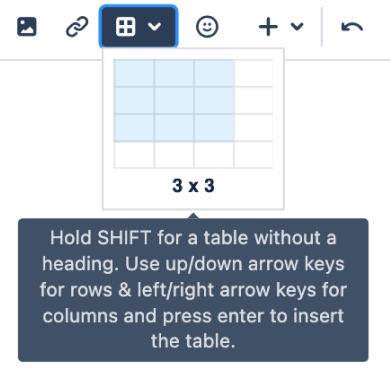
  1. Hit the Table button in the toolbar
  2. Click a cell in the drop-down to set the number of columns and rows in your table

Edit your table

To resize table columns, just click and drag the column's border. To make other changes to your table, click inside it to reveal the table toolbar.

Here's a summary of the table tools:

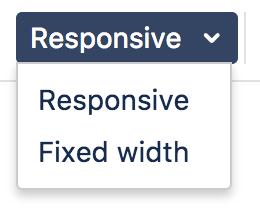
Screenshot of a dropdown menu in the Table toolbar showing the options Responsive and Fixed width.

Column width modes

  • Responsive – choose this mode if you want the table to expand as you add content. You can drag to resize the columns. It'll also resize itself to fit the page-viewer's window size (within reason).
  • Fixed width – choose this mode if you want to drag column borders to set width. Columns appear at your set size, regardless of content and window size.

Screenshot showing the various icons relating to table rows in the tables toolbar

Rows

  • Insert rows before or after the current row
  • Delete the current row
  • Cut, copy and paste the current row
  • Mark a row as a header row (shaded with bold text)

Columns

  • Insert columns before or after the current column
  • Delete the current column
  • Cut, copy and paste the current column
  • Mark a column as a header column (shaded with bold text)
  • Add a numbering column to automatically number each row

Cells

  • Merge selected cells
  • Split selected cells
  • Change cell color

Alignment

  • Align content to top
  • Align content to middle
  • Align content to bottom 

Screenshot of the Delete Table icon on the tables toolbar

Table

  • Delete entire table

Shortcut keys

Windows

Action

Mac OS X

||||| + enter

Add a table with a custom number of columns, as specified by the vertical bars (you can't insert a nested table with this shortcut)

||||| + enter

||heading||heading||  + enter

Add a table with custom headings as specified by the text (you can't insert a nested table with this shortcut)

||heading||heading||  + enter

For more editor keyboard shortcuts, see Keyboard shortcuts.

Sort the table

You can sort the contents of your table by selecting the sort icon in the table header row.

To preserve the order of a sorted table:

  1. Edit a page

  2. Go to the table, and select the sort icon for the column you want to sort

  3. Select Publish to save the changes

Screenshot: A colorful, sortable table


You can use the Cut row and Paste row icons to move rows around in the editor. 

Sticky table headers

In some instances the header rows of your table will stick to the top when you're scrolling down a page, making those really long tables easier to read. 

You don't need to do anything to enable sticky table headers, however there are a lot of situations where headers won't stick. These include when your table:

  • is nested inside a page layout, inside another table, or inside a macro
  • has no header row or there are cells in the top row that aren't marked as headers
  • has a header column, instead of a header row, and scrolls horizontally
  • contains another table that has its own header row

There's no way to freeze rows or columns in Confluence tables. 

See  CONFSERVER-54343 - Getting issue details... STATUS  for issues with sticky table headers.


Last modified on Jul 30, 2024

Was this helpful?

Yes
No
Provide feedback about this article
Powered by Confluence and Scroll Viewport.