Redirect HTTP Requests to HTTPS

Still need help?

The Atlassian Community is here for you.

Ask the community

Background

Bitbucket Server 4.0 enables additional security to protect against XSRF attacks a thorough explanation of XSRF and why it has been enabled on Bitbucket server is out of scope for this article. Briefly XSRF protection is enabled to prevent users being tricked into unintentionally submitting malicious data. For more information see https://en.wikipedia.org/wiki/Cross-site_request_forgery

This article describes how to securely redirect HTTP requests to the correct HTTPS URL, and never allow plain HTTP access (or mixed HTTP/HTTPS access) to your Bitbucket Server instance. 

You can configure your Bitbucket Server instance for HTTPS by following the instructions on the page Secure Bitbucket with Tomcat using SSL.  You may also wish to listen to plain HTTP requests and redirect them instantly to the secure HTTPS URL.  This allows users to navigate to http://bitbucket.mycompany.com/... (for example, by typing the URL directly in a browser) and still load the correct URL https://bitbucket.mycompany.com instead of receiving no content or a blank page. 

Prior to Bitbucket Server 4.0, a security constraint for redirecting from HTTP to HTTPS was not enforced, meaning users could type "http://<stash-url>" into their browser and still be shown a functioning version of Bitbucket Server (or Stash). Included with the release of Bitbucket Server 4.0 was a fix to enforce the security constraint. Using the previous security configuration with Bitbucket Server 4.0 means trying to access the application over an insecure connection, meaning if users type "http" when trying to get to the application, they could encounter erroneous behavior.

Symptoms

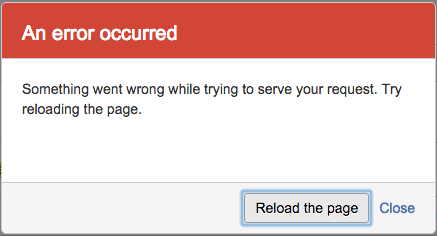
If your Bitbucket Server instance has been misconfigured to allow HTTP or mixed HTTP/HTTPS access, then you may observe the following error being triggered by Bitbucket's XSRF protection. 


How to redirect using Apache

  1. Edit  /etc/httpd/conf/httpd.conf

    RewriteEngine on
    RewriteCond %{HTTPS} !=on
    RewriteRule ^/(.*) https://%{HTTP_HOST}/$1 [NC,R=301,L] 
  2. You will need to restart Apache for your changes to take effect.

    apachectl -k graceful
  3. Verify that request are being redirected, see the section below on verification. 

How to redirect using Nginx

  1. Edit  /etc/nginx/nginx.conf and add the following section:

    server {
        listen         80;
        server_name    mycompany.com;
        return         301 https://$server_name$request_uri;
    }
  2. Run the following command to have Nginx reload it's configuration.

    nginx -s reload
  3. Verify that request are being redirected, see the section below on verification. 

How to redirect using HAProxy

  1. The below snippet configures a frontend named bitbucket-frontend to redirect all http traffic to https.

    frontend bitbucket-frontend
    	redirect scheme https code 301 if !{ ssl_fc }
  2. Restart HAProxy

    /etc/init.d/haproxy restart
  3. Verify that request are being redirected, see the section below on verification. 

How to redirect using Amazon ELB or other proxy


Bibtucket Server 5.0+ ...

If Bitbucket is configured behind a proxy/load balancer or other device that does not support redirection the following configuration can be used. In order for this configuration to work your device must be setup to direct http (port 80) and https (port 443) traffic to Bitbucket's port 7990. In this configuration, SSL terminates at load balancer (proxy). Note this configuration will redirect all http traffic to https except for requests for /status as some load balancers will mark a node as unavailable if they receive a redirect. This allows you to configure the load balancer to use /status as health check endpoint. 

  1. Within <Bitbucket Server home directory>/shared/bitbucket.properties, ensure the redirect-port exists in the insecure connector and is defined with the port of the secure connector. 
    Here is an example of the correct configuration.

    Secure port
    server.proxy-name=bitbucket.company.com
    server.proxy-port=443
    server.secure=true
    server.require-ssl=true
    server.redirect-port=443
  2. Restart Bitbucket Server.
Up to Bitbucket Server 4.14

If Bitbucket is configured behind a proxy/load balancer or other device that does not support redirection the following configuration can be used. In order for this configuration to work your device must be setup to direct http (port 80) traffic to Bitbucket's port 7991 and https (port 443) to Bitbucket's port 7990. Note this configuration will redirect all http traffic to https except for requests for /status as some load balancers will mark a node as unavailable if they receive a redirect. This allows you to configure the load balancer to use /status as health check endpoint. 

  1. Within <Bitbucket Server home directory>/shared/server.xml, ensure the redirectPort exists in the insecure connector and is defined with the port of the secure connector. 
    Here is an example of the correct configuration.

    Secure port
            <Connector port="7990" protocol="HTTP/1.1"
                       maxHttpHeaderSize="65536"
                       proxyName="bitbucket.company.com"
                       proxyPort="443"
                       URIEncoding="UTF-8"
                       secure="true"
                       scheme="https"
                       connectionTimeout="20000"
                       useBodyEncodingForURI="true"
                       compression="on"
                       compressableMimeType="text/html,text/xml,text/plain,text/css,application/json,application/javascript,application/x-javascript" />
    
    Insecure port
            <Connector port="7991" protocol="HTTP/1.1"
                       maxHttpHeaderSize="65536"
                       URIEncoding="UTF-8"
                       connectionTimeout="20000"
                       useBodyEncodingForURI="true"
                       redirectPort="443"
                       compression="on"
                       compressableMimeType="text/html,text/xml,text/plain,text/css,application/json,application/javascript,application/x-javascript" />
  2. Within <Bitbucket Server installation directory>/conf/web.xml add the following configuration before the closing </web-app> tag in the following file:

    <Bitbucket Server installation directory>/conf/web.xml
    <security-constraint>
        <web-resource-collection>
            <web-resource-name>HTTPSOrHTTP</web-resource-name>
            <url-pattern>/status*</url-pattern>
        </web-resource-collection>
        <user-data-constraint>
            <transport-guarantee>NONE</transport-guarantee>
        </user-data-constraint>
    </security-constraint>
    <security-constraint>
         <web-resource-collection>
             <web-resource-name>HTTPSOnly</web-resource-name>
             <url-pattern>/*</url-pattern>
         </web-resource-collection>
         <user-data-constraint>
             <transport-guarantee>CONFIDENTIAL</transport-guarantee>
         </user-data-constraint>
    </security-constraint>
  3. Restart Bitbucket Server.

How to redirect without using proxy


Bitbucket Server 5.0+ ...

If you do not use a proxy and your SSL is terminated on Bitbucket server, the following configuration should be used. It assumes that HTTP port is 7990, and HTTPS port is 8443

  1. Within <Bitbucket Server home directory>/shared/bitbucket.properties, ensure the redirect-port exists in the insecure connector and is defined with the port of the secure connector. 
    Here is an example of the correct configuration.


    server.additional-connector.1.port=8443
    server.additional-connector.1.scheme=https
    server.additional-connector.1.ssl.enabled=true
    server.additional-connector.1.ssl.client-auth=want
    server.additional-connector.1.ssl.protocol=TLSv1.2
    server.additional-connector.1.ssl.key-alias=tomcat
    server.additional-connector.1.ssl.key-store=/path/to/keystore/bitbucket.jks
    server.additional-connector.1.ssl.key-store-password=<password value>
    server.additional-connector.1.ssl.key-password=<password value>
    
    
    Insecure port
    server.port=7990
    server.redirect-port=8443
    server.require-ssl=true
  2. Restart Bitbucket Server.
Up to Bitbucket Server 4.14 ...


  • Within <Bitbucket Server home directory>/shared/server.xml, ensure the redirectPort exists in the insecure connector and is defined with the port of the secure connector. 

    Here is an example of the correct configuration.

    Secure port
    <Connector port="8443" 
      maxHttpHeaderSize="8192" 
      SSLEnabled="true"
    	maxThreads="150" 
      minSpareThreads="25" 
      maxSpareThreads="75"
    	enableLookups="false" 
      disableUploadTimeout="true" 
      useBodyEncodingForURI="true"
    	acceptCount="100" 
      scheme="https" 
      secure="true"
    	clientAuth="false" 
      sslProtocol="TLSv1.2" />
    Insecure port
     <Connector port="7990"
        protocol="HTTP/1.1"
        connectionTimeout="20000"
        useBodyEncodingForURI="true"
        redirectPort="8443"
        compression="on"
        compressableMimeType="text/html,text/xml,text/plain,text/css,application/json,application/javascript,application/x-javascript" />
  • Within <Bitbucket Server installation directory>/conf/web.xml add the following configuration before the closing </web-app> tag in the following file:

    <Bitbucket Server installation directory>/conf/web.xml
    <security-constraint>
        <web-resource-collection>
            <web-resource-name>HTTPSOrHTTP</web-resource-name>
            <url-pattern>/status*</url-pattern>
        </web-resource-collection>
        <user-data-constraint>
            <transport-guarantee>NONE</transport-guarantee>
        </user-data-constraint>
    </security-constraint>
    <security-constraint>
         <web-resource-collection>
             <web-resource-name>HTTPSOnly</web-resource-name>
             <url-pattern>/*</url-pattern>
         </web-resource-collection>
         <user-data-constraint>
             <transport-guarantee>CONFIDENTIAL</transport-guarantee>
         </user-data-constraint>
    </security-constraint>
  • Restart Bitbucket Server.


Verification 

There are a number of ways to verify that configuration has been setup correctly two of them are.

  1. Using a browser once Bitbucket Server starts entirely, try navigating to any page within the application prefixed by "http," and you should be automatically redirected to the same address prefixed by "https."
  2. Using curl run the following command

    curl -v http://bitbucket.mycompany.com/

    Verify that you get a response with a 301 or 302 header such as

    * Connected to bitbucket.mycompany.com (172.x.x.x) port 80 (#0)
    > GET / HTTP/1.1
    > Host: stash.atlassian.com
    > User-Agent: curl/7.43.0
    > Accept: */*
    >
    < HTTP/1.1 301 Moved Permanently
    < Server: nginx
    < Date: Fri, 25 Sep 2015 02:35:29 GMT
    < Content-Type: text/html
    < Content-Length: 178
    < Connection: keep-alive
    < Location: https://bitbucket.mycompany.com/


Last modified on May 10, 2017

Was this helpful?

Yes
No
Provide feedback about this article
Powered by Confluence and Scroll Viewport.