"Access Denied" when testing connection to search server in Bitbucket Data Center
Platform notice: Server and Data Center only. This article only applies to Atlassian products on the Server and Data Center platforms.
Support for Server* products ended on February 15th 2024. If you are running a Server product, you can visit the Atlassian Server end of support announcement to review your migration options.
*Except Fisheye and Crucible
For Bitbucket 7.20 and below, Elasticsearch was bundled. Starting with 7.21, OpenSearch is the bundled search server
Problem
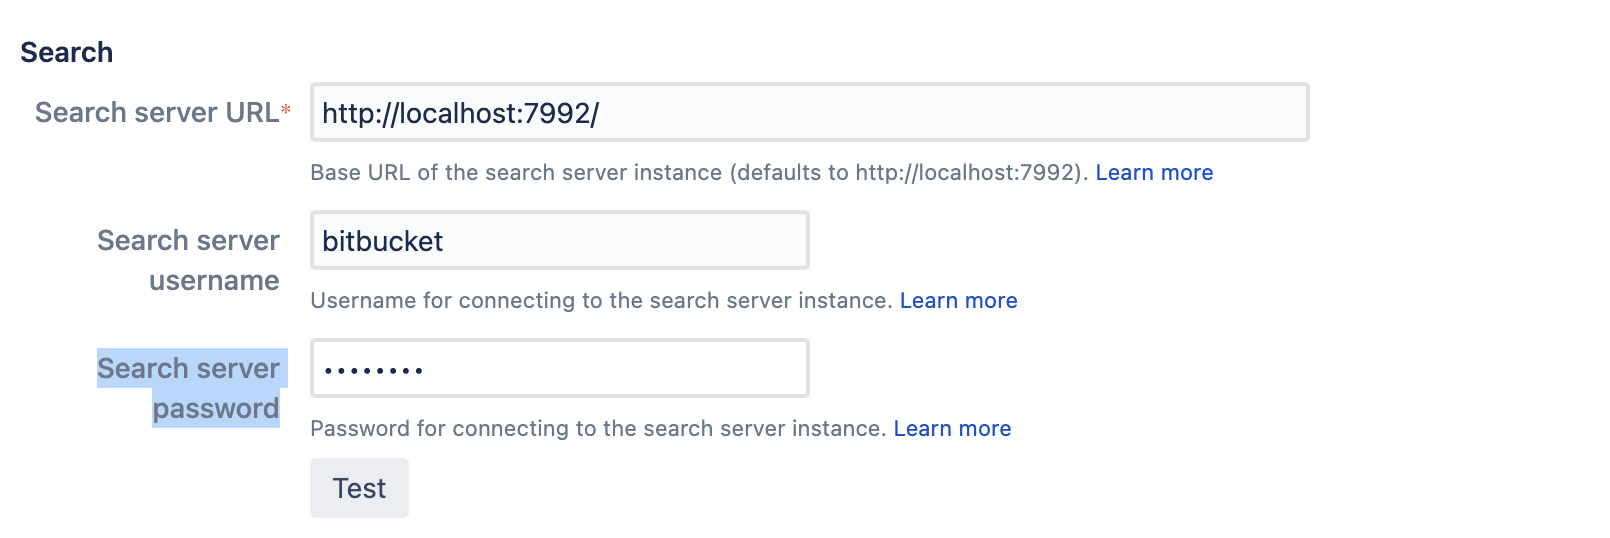
The information that is in the Search section of the Administration > Server Settings page when sent after pressing the "Test" button results in the "Access denied" when using the Embedded Search server.
Resolution
We need to reset the password on the Search server.
For Elasticsearch
Updating the credentials on the buckler.yml and restarting the Elasticsearch service should fix this issue.
Shutdown Elasticsearch and Bitbucket Server
# service atlbitbucket stopEdit the
buckler.ymlfile. Back it up first# vi /var/atlassian/application-data/bitbucket/shared/search/buckler/buckler.yml- Right after the text "
auth.basic.password:" remove the current default password and replace it with any password of your choice. Next, start up Bitbucket Server and ensure you're able to access Elasticsearch at
http://localhost:7992in the browser.# service atlbitbucket start- Perform a test and enter the credentials on the pop-up dialog with the updated credentials to see if you're able to log in.
- If you're able to log in, attempt to test with the same credentials from the Bitbucket Server Administration area
- If you are not able to log in:
- Navigate to Administration > Server Settings > Search
- Paste the chosen password from Step 3 into the "Search server password" field
For Opensearch
For Linux
Step 1: Create a new password hash
Passwords are stored in a hash format in a file named internal_users.yml file. As the name suggests this file stores user credentials including the admin user. Therefore, the first step is to create the hash. Opensearch provides a script to create a password hash.
- Run the below shell script for Linux:
cd /opt/atlassian/bitbucket/atlassian-bitbucket-7.21.0/opensearch/plugins/opensearch-security/tools/
/bin/bash +x hash.sh
[Password:]
$2y$12$xJFIfgehXFcZ3Rn6iOwW3O8ckusMTv9iTDXxJmWD3FZUVSynB5quy
You will be prompted to enter a password and outputs its hash. You can use bitbucket-changeit for example. Copy the output as we are going to store it in internal_users.yml
Here /opt/atlassian/bitbucket/atlassian-bitbucket-7.21.0 is our installation directory for Bitbucket 7.21.0.
Step 2: Update internal_users.yml
- Open the
internal_users.ymlfile in <Bitbucket-installation-directory>/opensearch/plugins/opensearch-security/securityconfig:
vi /opt/atlassian/bitbucket/atlassian-bitbucket-7.21.0/opensearch/plugins/opensearch-security/securityconfig/internal_users.yml 2. Find the “admin” user section and update the hash value with what you got in the previous step:
admin:
hash: "$2y$12$xJFIfgehXFcZ3Rn6iOwW3O8ckusMTv9iTDXxJmWD3FZUVSynB5quy"
reserved: true
backend_roles:
- "admin"
description: "Demo admin user"
Step 3: Apply security changes
Make the securityadmin.sh file executable first by running the below command:
cd /opt/atlassian/bitbucket/atlassian-bitbucket-7.21.0/opensearch/plugins/opensearch-security/tools/
chmod +x securityadmin.sh
Run the below command with your custom paths for Bitbucket home and installation directory.
- In the below command, the Bitbucket home path is
/var/atlassian/application-data/bitbucketand the Bitbucket installation directory path is/opt/atlassian/bitbucket/atlassian-bitbucket-7.21.0.
/opt/atlassian/bitbucket/atlassian-bitbucket-7.21.0/opensearch/plugins/opensearch-security/tools/securityadmin.sh --port 7993 \
 -f /opt/atlassian/bitbucket/atlassian-bitbucket-7.21.0/opensearch/plugins/opensearch-security/securityconfig/internal_users.yml \
 -t internalusers \
 -icl \
 -nhnv \
 -cacert /var/atlassian/application-data/bitbucket/shared/search/config/root-ca.pem \
 -cert /var/atlassian/application-data/bitbucket/shared/search/config/bitbucket.pem \
 -key /var/atlassian/application-data/bitbucket/shared/search/config/bitbucket-key.pem
2. This is the output you'll see if it is successful and you've supplied the correct paths:
Security Admin v7
WARNING: Seems you want connect to the OpenSearch HTTP port.
         securityadmin connects on the transport port which is normally 9300.
Will connect to localhost:7993 ... done
Connected as CN=BITBUCKET
OpenSearch Version: 1.2.4
OpenSearch Security Version: 1.2.4.0
Contacting opensearch cluster 'opensearch' and wait for YELLOW clusterstate ...
Clustername: bitbucket_search
Clusterstate: YELLOW
Number of nodes: 1
Number of data nodes: 1
.opendistro_security index already exists, so we do not need to create one.
Populate config from /opt/atlassian/bitbucket/atlassian-bitbucket-7.21.0/opensearch/plugins/opensearch-security/tools
Force type: internalusers
Will update '_doc/internalusers' with /opt/atlassian/bitbucket/atlassian-bitbucket-7.21.0/opensearch/plugins/opensearch-security/securityconfig/internal_users.yml
   SUCC: Configuration for 'internalusers' created or updated
Done with success
Lastly, attempt to test with the same credentials from the Bitbucket Server Administration area under Search
In case if this doesn't work, try the following steps. (This works only on Linux, for now)
- Shut down your bitbucket instance.
- Delete the all contents of this folder
$BITBUCKET_HOME/shared/search - Start up Bitbucket and wait for some time for the initial search index creation.
- After that, run Step 3: Apply security changes from above.
- Once it's successful, try to click on the Test button on Bitbucket UI → Administration → Server settings → Under search, with the password you had used in Step 1: Create a new password hash. You can see that the test is successful and the password has been reset.
For Windows
Step 1: Create a new password hash
Passwords are stored in a hash format in a file named internal_users.yml file. As the name suggests this file stores user credentials including the admin user. Therefore, the first step is to create the hash. Opensearch provides a script to create a password hash.
- For Windows, you have to enter into the
<Bitbucket-installation-directory>\opensearch\plugins\opensearch-security\tools>and run thehash.batfile
cd C:\Atlassian\Bitbucket\atlassian-bitbucket-7.21.0\opensearch\plugins\opensearch-security\tools>
C:\Atlassian\Bitbucket\atlassian-bitbucket-7.21.0\opensearch\plugins\opensearch-security\tools> .\hash.bat
[Password:]
$2y$12$zjrg.uQxhyOAbpZ1WPBCyeCjPB60K5k3U/p9PmxlllfI8vBgahhga
You will be prompted to enter a password and outputs its hash. You can use bitbucket-changeit for example. Copy the output as we are going to store it in internal_users.yml
Here C:\Atlassian\Bitbucket\atlassian-bitbucket-7.21.0 is our installation directory for Bitbucket 7.21.0.
Step 2: Update internal_users.yml
- Go to
<Bitbucket-installation-directory>\opensearch\plugins\opensearch-security\securityconfig - Open the
internal_users.ymlfile in a text editor - Find the “
admin” user section and update the hash value with what you got in the previous step:
_meta:
  type: "internalusers"
  config_version: 2

bitbucket:
  # Default "bitbucket-changeit" password which will be updated by automatic provisioning
  hash: "$2y$12$zjrg.uQxhyOAbpZ1WPBCyeCjPB60K5k3U/p9PmxlllfI8vBgahhga"
  backend_roles:
    - "admin"
  description: "Admin user"
Step 3: Apply security changes
- Run the below command with your custom paths for Bitbucket home and installation directory. In the below command, the home path is
D:\bitbucket-home\and the installation directory path isC:\Atlassian\Bitbucket\atlassian-bitbucket-7.21.0. - Open a Powershell Window or Command Prompt in the
C:\Atlassian\Bitbucket\atlassian-bitbucket-7.21.0\opensearch\plugins\opensearch-security\toolsand run the below command:
.\securityadmin.bat --port 7993 -f C:\Atlassian\Bitbucket\atlassian-bitbucket-7.21.0\opensearch\plugins\opensearch-security\securityconfig\internal_users.yml -t internalusers -icl -nhnv -cacert D:\bitbucket-home\shared\search\config\root-ca.pem -cert D:\bitbucket-home\shared\search\config\bitbucket.pem -key D:\bitbucket-home\shared\search\config\bitbucket-key.pem3. This is the output you will get:
Security Admin v7
WARNING: Seems you want connect to the OpenSearch HTTP port.
         securityadmin connects on the transport port which is normally 9300.
Will connect to localhost:7993 ... done
Connected as CN=BITBUCKET
OpenSearch Version: 1.2.4
OpenSearch Security Version: 1.2.4.0
Contacting opensearch cluster 'opensearch' and wait for YELLOW clusterstate ...
Clustername: bitbucket_search
Clusterstate: YELLOW
Number of nodes: 1
Number of data nodes: 1
.opendistro_security index already exists, so we do not need to create one.
Populate config from C:\Atlassian\Bitbucket\atlassian-bitbucket-7.21.0\opensearch\plugins\opensearch-security\tools
Force type: internalusers
Will update '_doc/internalusers' with C:\Atlassian\Bitbucket\atlassian-bitbucket-7.21.0\opensearch\plugins\opensearch-security\securityconfig\internal_users.yml
   SUCC: Configuration for 'internalusers' created or updated
Done with success
Lastly, attempt to test with the same credentials from the Bitbucket Server Administration area under Search
Cause
The password expected by the Search server is out of sync with the one that Bitbucket Server is using to authenticate.